Photorealistic 3D Packaging Rendering with PackCAD Mockup
PackCAD Mockup is browser-based software that turns flat dielines into foldable 3D packaging mockups. This guide covers PackCAD Mockup’s Render tool, which creates photorealistic path-traced renderings of your 3D packaging designs in just a few clicks.
Setup
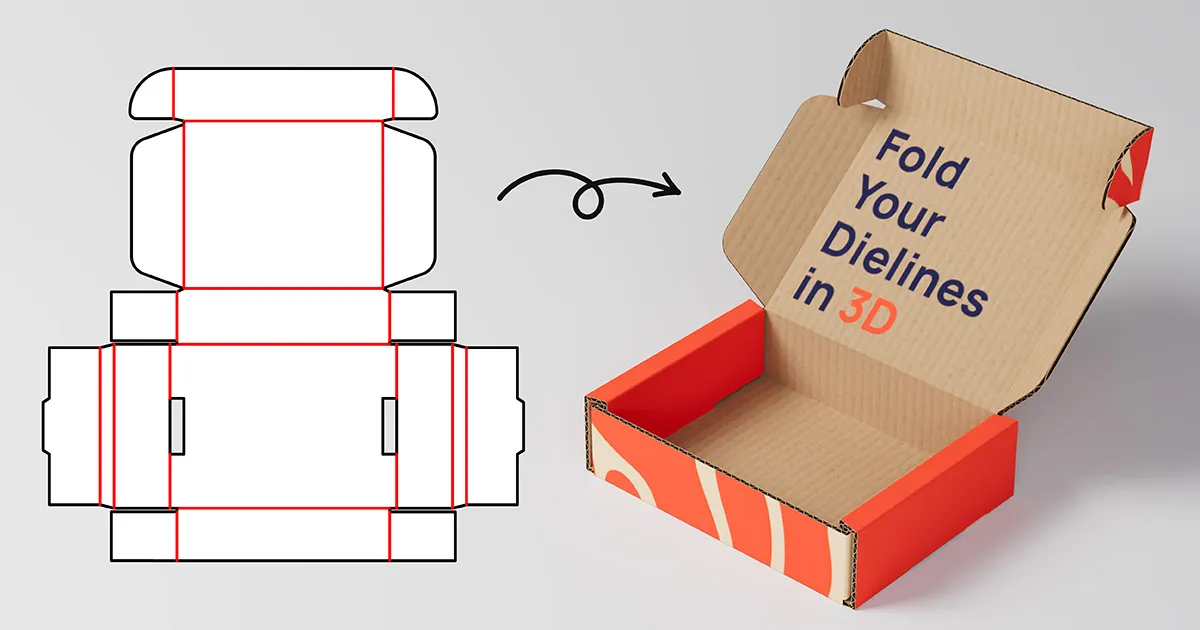
First you’ll need to pose your model and apply artwork, finishes and effects, and materials for rendering. If you’re new to PackCAD Mockup, the Getting Started guide covers these steps.
Folding and posing the mailer box model before rendering.
Always save your project with File > Save Project before rendering. Large renders can cause your browser to reload the page, losing unsaved changes.
To open the rendering workflow, select Render from the Postprocessing section of the left menu, or from File > Render Image...
Live Preview
When the Render window opens, a live preview of your scene appears on the right. The preview responds to settings changes in real time, so you can frame your shot and adjust the lighting interactively. Drag the preview to rotate your model and scroll to zoom. To snap to a standard view, click a face, edge, or corner of the navigation control in the top-right corner of the preview, which shows your model’s front, top, sides, and back as an unfolded box. The zoom slider below it, with and at either end, sets how much of the frame your design fills.
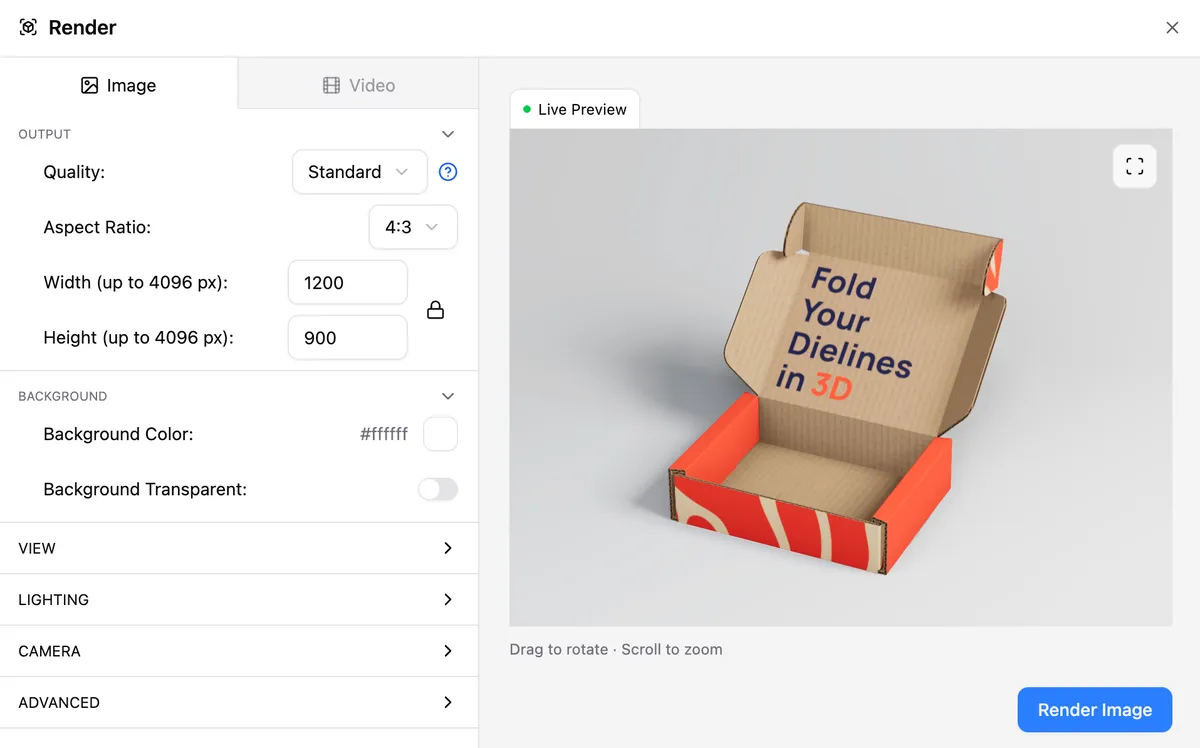
What you see in the live preview is very close to what the final render will look like, but there may be some slight differences in the lighting. We always recommend performing a test render (Output > Quality > Test) to check your settings.
Rendering Settings
You can adjust the output, background, view angle, lighting, camera, and advanced rendering settings via the panel on the left side of the Render window. PackCAD Mockup’s default settings work well for most packaging designs, though you may want to increase the output image size and the quality for your final render.
In most cases, using the default settings and adjusting only Output > Quality, Width, and Height is enough to create a presentation-ready rendering of your packaging.
Image/Video Tabs
Two tabs at the top of the settings panel control whether to render an Image or a Video. This guide covers the Image tab; a dedicated guide to exporting video animations is coming soon.
Output
- Quality - Chooses how the image is produced, from a fast screenshot to a fully path-traced render. This is the setting that decides how long your render takes.
- Screenshot (Fastest) - Captures the live preview at full resolution in a few seconds. No path-tracing, so shadows and reflections are the preview’s approximations rather than traced light.
- Test - A quick path-traced render at 40 samples; enough to judge lighting, framing, and materials.
- Standard - The default, at 150 samples. A good balance of quality and render time for most packaging shots. On modern hardware, rendering 4K at Standard quality takes about 2-3 minutes.
- High - 500 samples, for a final presentation image. On modern hardware, rendering 4K at High quality takes about 6-7 minutes.
- Aspect Ratio - Choose a preset (1:1, 4:3, 3:2, 16:9, or 9:16), or select Custom to use any proportions.
- Width and Height - Set the output size, from 200px up to 4096px on each side. The button keeps the aspect ratio locked while you edit either value.
A good workflow is to set Output > Quality to Test or Standard to get the lighting and framing right, then switch to High for the final image. The default output width is intentionally small (1200px) so test renders finish quickly.
Background
- Background Color - Sets the seamless backdrop color behind your packaging.
- Background Transparent - Drops the backdrop so the image exports as a PNG with an alpha channel. The live preview shows a checkerboard where the backdrop would be.
The Background Color sets the backdrop of the rendered image, and the live preview updates as you pick.
View
You can drag and scroll the live preview window to orient your model for rendering, but if you need precise control, you can also enter numeric values directly in the View settings.
Changing Rotation and Elevation in the live preview; the soft shadows take a moment to recompute after each change.
- Rotation - Spins the camera around your design.
- Elevation - 0° views the design straight on; higher values look down on it from above.
- Zoom - What percent of the frame your design fills.
Lighting
- Key Angle - Moves the main light around your design, changing where highlights and shadows fall.
- Key Intensity - Brightness of the main light; higher values create stronger highlights and deeper shadows.
- Fill Intensity - Brightness of the secondary light, which sits 90° from the main light and softens its shadows.
- Ambient Intensity - Soft light coming from all directions; higher values brighten the whole scene and soften shadows.
- Exposure - Overall image brightness, similar to a camera’s exposure setting. Unlike the four lights above, this doesn’t change how the scene is lit, it changes how brightly the result is rendered.
Changing the Key Angle moves the highlights and shadows across the box. The soft shadows take a moment to recompute after each change.
Camera
- Camera Type - Switch between Perspective, which looks like a photo from a real camera with natural depth, and Orthographic, which keeps parallel edges perfectly parallel, like a technical drawing.
- FOV - Sets how wide the perspective camera sees (the field of view). Low values zoom in like a telephoto lens, and high values show more of the scene and exaggerate depth like a wide-angle lens.
Advanced
The Advanced section holds the individual settings behind the quality presets. Change any of them and Output > Quality switches to Custom.
- Photorealistic - On by default. Traces light through the scene for accurate shadows and reflections, which can take several minutes to render. Turn it off for Screenshot mode, which captures the live preview at full resolution in a few seconds.
- Samples - The number of passes the renderer makes. More samples produce a sharper, less grainy image but take longer to render.
- Light Bounces - How many times light can bounce between surfaces, from 1 to 5. More bounces add subtle indirect lighting but take longer to render.
- Denoise - On by default. Denoising smooths out the graininess left over from under-sampling, producing a clean image. The lower your Samples, the more it helps. Denoising can slightly soften fine detail in your artwork, so turn it off only if you’re rendering at a very high sample count (at least 500 samples) and want every last bit of texture detail.
Samples, Light Bounces, and Denoise only apply to photorealistic rendering, so they’re hidden when Photorealistic is off.
Render Image
Click Render Image in the lower-right corner to begin. A progress bar along the bottom edge of the image tracks the render, with the stages and elapsed time shown below it.
Sampling accounts for most of the render time, and takes longer on older hardware. If the image looks good enough partway through and you don’t want to wait for additional samples, click Finish Sampling to stop sampling early and move on to the remaining stages. Click Cancel to abandon the render and return to the live preview.
Keep the browser tab open and the window visible while a render runs. If you switch away, your computer may pause the render to save power.
Render Stages
A photorealistic render runs through up to three stages:
- Sampling - Traces light through the scene, one sample at a time, up to the Advanced > Samples count. This is the longest stage, and the counter beside it shows how far along it is.
- Masking (optional) - Only for transparent backgrounds. Works out which pixels belong to your packaging and its shadows, and which belong to the backdrop, so the cutout edges stay clean and the semi-transparent shadows can be overlaid on any background.
- Denoising - Smooths out the remaining graininess. Runs whenever Advanced > Denoise is on, which is the case for all three photorealistic presets.
A screenshot (Output > Quality > Screenshot) doesn’t path-trace, so it has no stages. It accumulates soft shadows for a few seconds and finishes.
Image Gallery
Each finished render is added to an image gallery for your current session. Use the tabs above the image to switch between the Live Preview and your rendered images. A label in the lower-left corner of each image lists its resolution, whether it’s a photorealistic render or a screenshot, and the quality it was rendered at. The gallery holds up to 5 images; delete one with in the top-right corner to make room for more.
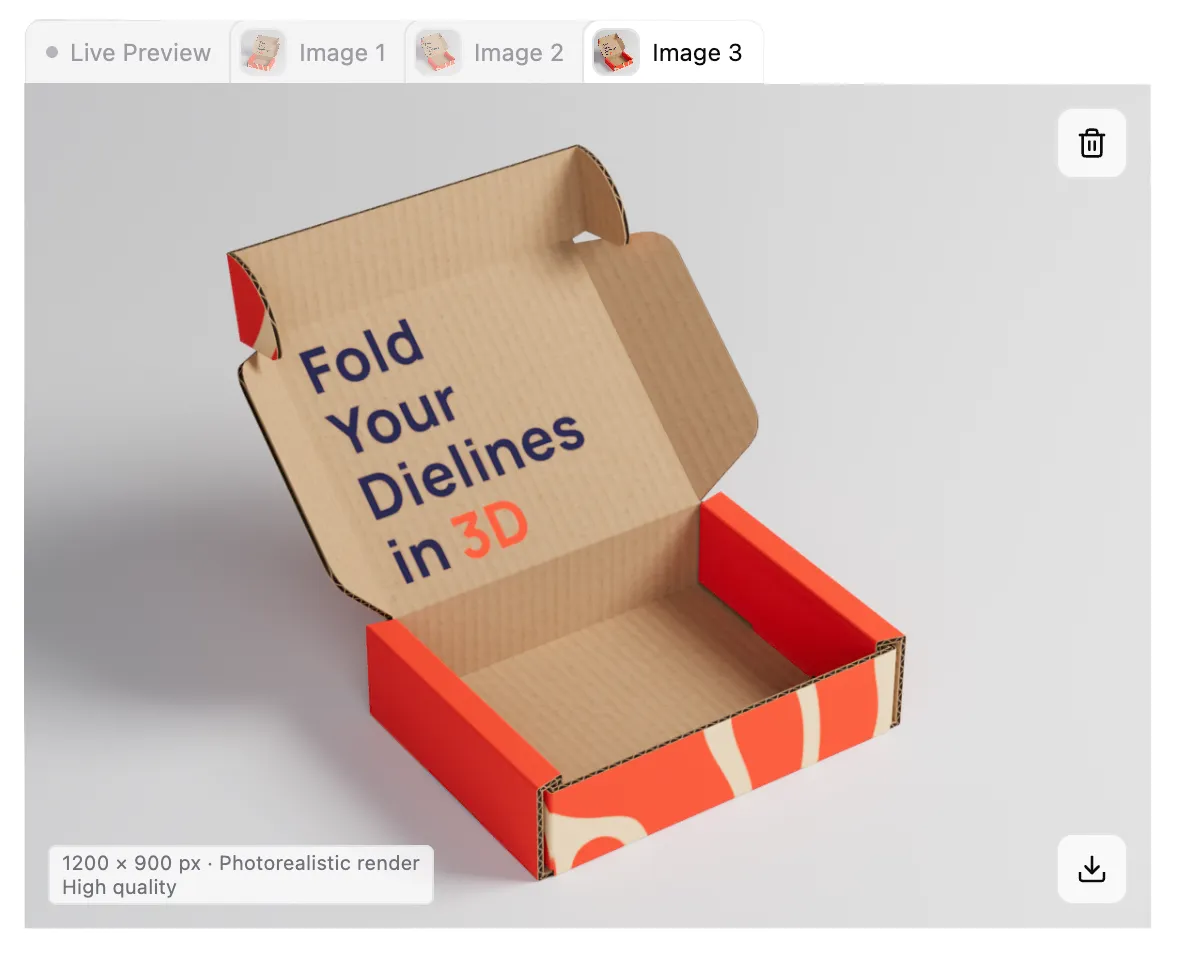
Images live in the app for your current session only and are not saved with your project file. Click to download any image you want to keep.
Downloading
If you’re signed in with a Pro subscription, each finished image downloads automatically as a PNG when it completes, named after your project. You can also select any image in the gallery and click to download it again. PackCAD Mockup Pro lets you create watermark-free renderings at up to 4K resolution.
Want to try the full workflow? Renders of the built-in example file have no watermark and can be downloaded by any signed-in user for free.
Troubleshooting
PackCAD Mockup’s renderer has been tested primarily in the desktop Chrome browser. If you’re running into problems, try switching to Chrome.
| Problem | Solution |
|---|---|
| Grainy or speckled image | The render didn’t accumulate enough samples to resolve cleanly. Raise Output > Quality to High, or raise Advanced > Samples directly, and check that Advanced > Denoise is on. |
| Soft or blurry image | Denoising can soften fine artwork detail. Turn Advanced > Denoise off and raise Advanced > Samples to compensate, or increase the Output > Width and Height. |
| Denoising failed | The denoise pass ran out of graphics memory, so the render was kept as it came out of sampling and may look grainy. Reduce the Output > Width and Height so that denoise can proceed without the memory limitation, or raise Advanced > Samples so denoising isn’t needed. |
| The render couldn’t finish | Very large renders can exceed your computer’s hardware limits. Reduce the Output > Width and Height, close other browser tabs, and click Render Image to try again. If the problem persists, reload the page, or set Output > Quality to Screenshot. |
| Long render times | With the default Standard quality, modern computer hardware can render a 4K image in 2-3 minutes; older or less powerful computers may take significantly longer. Render time scales with the image size, number of samples, and number of light bounces. Drop Output > Quality to Test to check your settings quickly, or to Screenshot for a render at 4K in a few seconds. |
| Graphics context was lost | Your graphics card ran out of resources mid-render. Reduce the Output > Width and Height, close other browser tabs, and click Render Image to try again. Set Output > Quality to Screenshot if the problem persists. |
| Preview lost its connection | The live preview’s connection to your graphics card was dropped, so nothing can be rendered until it’s rebuilt. Close and reopen the Render window. |
| Render size not supported | Some graphics cards cap renders below 4096px. The message names the largest size your card supports; reduce the Output > Width and Height to fit within it. |
| Image gallery full | The gallery holds up to 5 images at a time. Download anything you want to keep, then delete an image from the gallery to start another render. |
| No panels to render | The design has no geometry to draw. Import a dieline before opening the Render window. |
Going Further
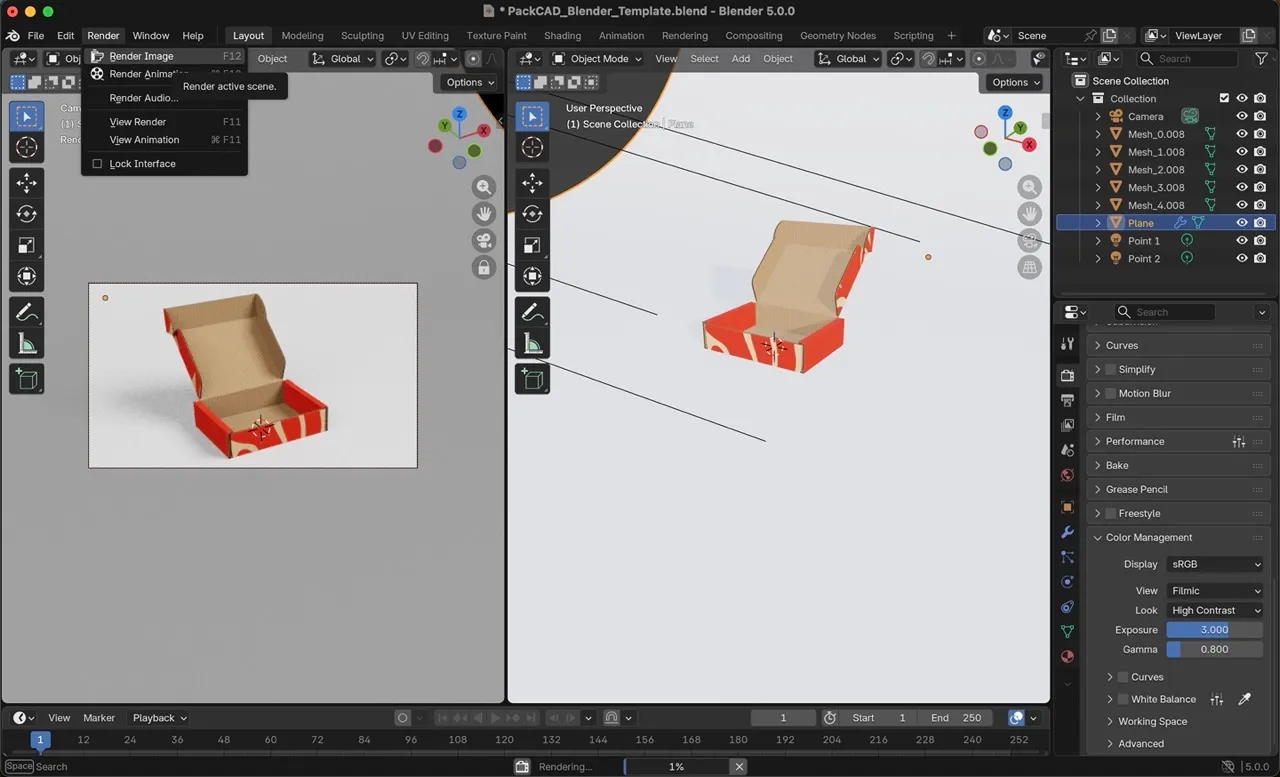
For most packaging visualization work, PackCAD Mockup’s built-in render tool is all you need. If you want to set up a custom environment or your own lighting rig, export your 3D model via File > Export 3D Model and follow our Photorealistic 3D Packaging Mockups with Blender tutorial, which includes a template with a studio lighting setup for the free, open-source Blender software.