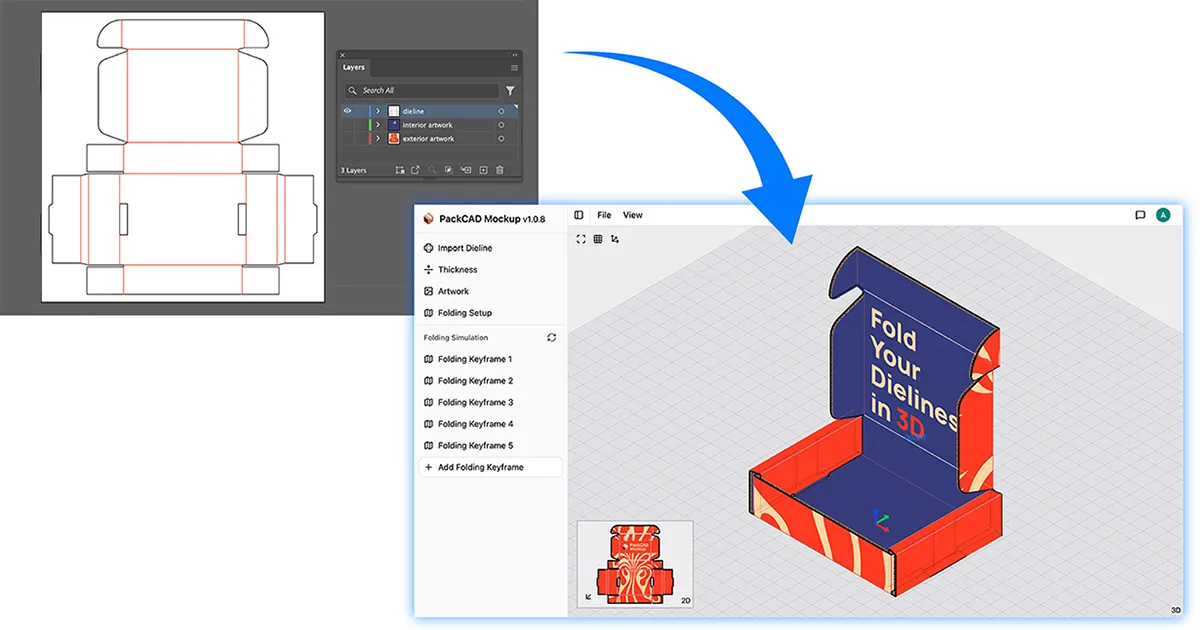
Getting Started with PackCAD Mockup
PackCAD Mockup is an online tool that converts flat dielines into realistic 3D packaging mockups. This guide walks you through preparing and uploading files, keyframing folding animations, and exporting 3D models in PackCAD Mockup.
Preparing Files
Prepare Dieline
A dieline is a vector drawing that defines the cut and fold lines of your packaging. In this tutorial, we will use Adobe Illustrator to prepare the dieline for PackCAD Mockup, but any vector editor (such as CorelDRAW, Inkscape, or Affinity) will work. You can follow along with our example Illustrator file: MailerBox.ai

The example file contains several layers: one for the dieline, and additional artwork layers. First, hide all layers except the dieline layer so you can export the dieline by itself. PackCAD Mockup uses the stroke color of lines to determine their type: cut lines should be black (#000000) and fold lines should be red (#ff0000) , blue (#0000ff) , magenta (#ff00ff) , or yellow (#ffff00) . Adjust the stroke colors on your dieline to match these settings if needed. The colors don’t need to be exact — they’re matched with a generous tolerance, so close shades (including CMYK) will work.
Prepare the dieline as an SVG with no artwork included. Front and backside artwork is imported separately as PNG/JPG.
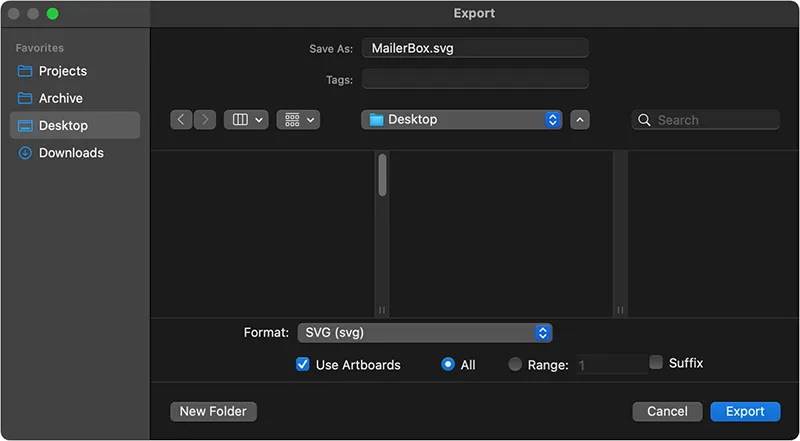
Export the dieline as an SVG. Select Use Artboards during export so that the dieline will automatically line up with its artwork once we import everything into PackCAD Mockup.
Always check Use Artboards when exporting from Adobe Illustrator. Using the same artboard for every file is what keeps your dieline and artwork aligned to each other.
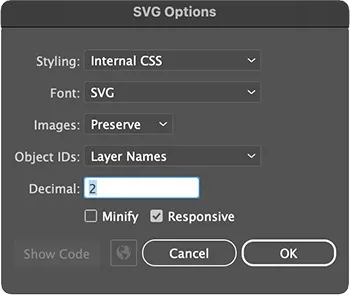
Most SVG export options will work, the settings shown above produced this SVG file: MailerBox.svg
Prepare Artwork
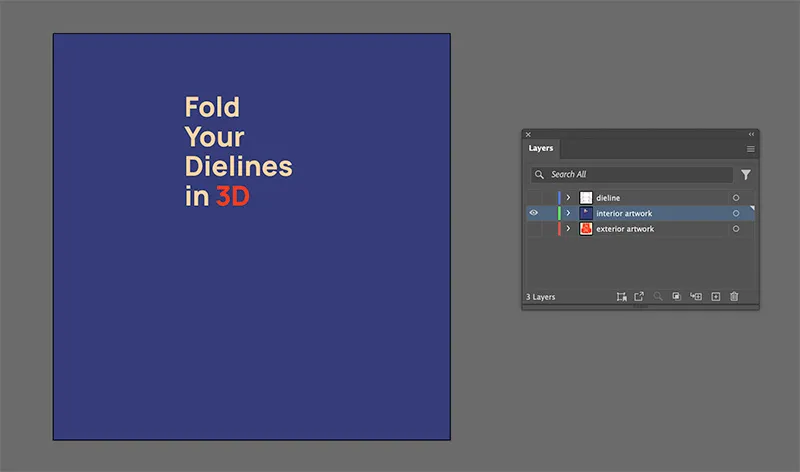
Next, export the artwork layers individually as a PNG or JPG. Again, select Use Artboards so that the artwork will align to the dieline once imported into PackCAD Mockup.

Export each artwork layer as a separate image. In our example we have two artwork layers, corresponding to the interior and exterior of the mailer box: MailerBox-interior.png and MailerBox-exterior.png
Project Setup
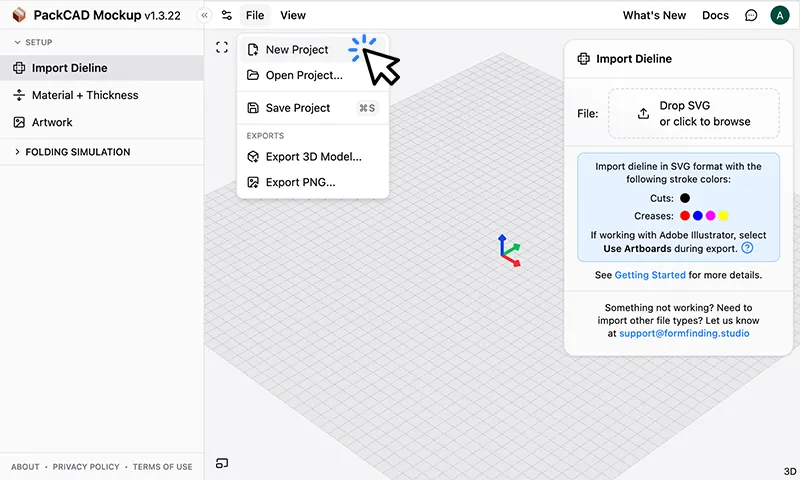
Open PackCAD Mockup on any device and click File > New Project to open a blank project. In the left menu you’ll find Import Dieline, Material & Thickness, and Artwork. Work through each step in order (top to bottom) to set up your project for folding.
Import Dieline
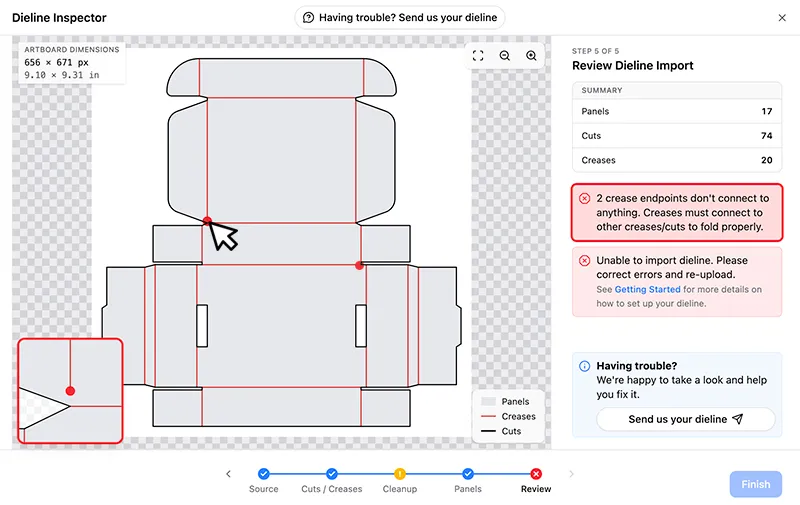
Import the dieline SVG file by dragging it into PackCAD Mockup. The Dieline Inspector will open and walk you through any issues validating your dieline for import. Once successfully imported, you will see your dieline in the 3D view. See Troubleshooting Dieline Import for help resolving common import errors and warnings.
Dielines often fail to import because of small, unintentional gaps where lines should intersect (see below). PackCAD Mockup will highlight these types of errors during import. Click/hover an error or warning to see a zoomed in view:
Material & Thickness
Select Material & Thickness from the left menu and choose a material type and thickness from the presets, or define a custom thickness value. For corrugated cardboard, you can select the Flute Size and Flute Angle (orientation) of the flutes. Use Offset Direction to control how thickness is applied: toward the interior, toward the exterior, or evenly on both sides.
PackCAD Mockup renders corrugated cardboard in 3D, so the flute orientation stays accurate even along the exposed cut edges of your design.
Import Artwork
Select Artwork from the left menu and upload both the exterior and interior artwork files. You should see the print graphics rendered onto the top and bottom side of the dieline visualization. Select the three dots to the right of the file thumbnail to optionally mirror your artwork (this may be required for interior artwork).
The exterior artwork will be on the bottom side of the dieline if you left Exterior side face down selected during import. Rotate the model to see the bottom (exterior) side.
Folding Simulation
Folding Setup
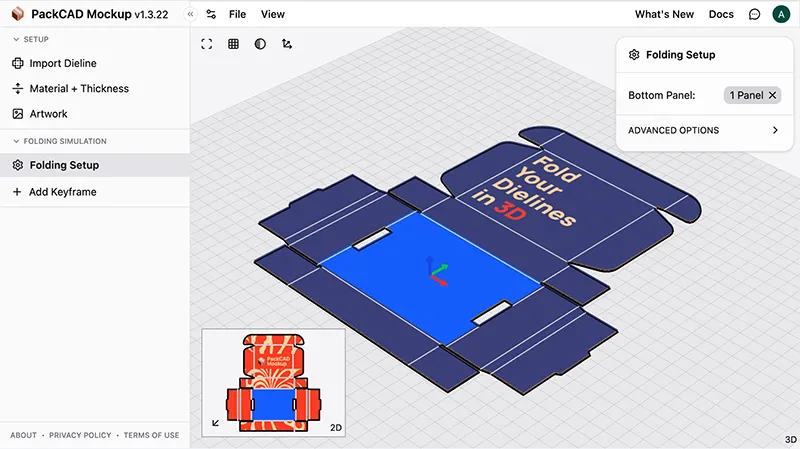
Select Folding Setup from the left menu, then select the bottom panel of the dieline. This panel will remain pinned to the ground plane during folding:
Keyframe Folding Animation
Click Add Keyframe from the left menu, and then select the creases to fold in this step. Enter a numeric value for the fold angle; the visualization updates in real-time.
Continue adding keyframes until your design is fully folded. Replay the keyframed animation using in the left menu or press the R hotkey. For more details on fold angles, constraints, and advanced keyframe techniques, see the 3D Folding Simulation guide.
Export 3D Model
Go to File > Export 3D Model and select your preferred 3D format. The exported 3D model contains your artwork and can be used for proofing, AR/VR previews, or photorealistic rendering in Blender and other 3D tools.
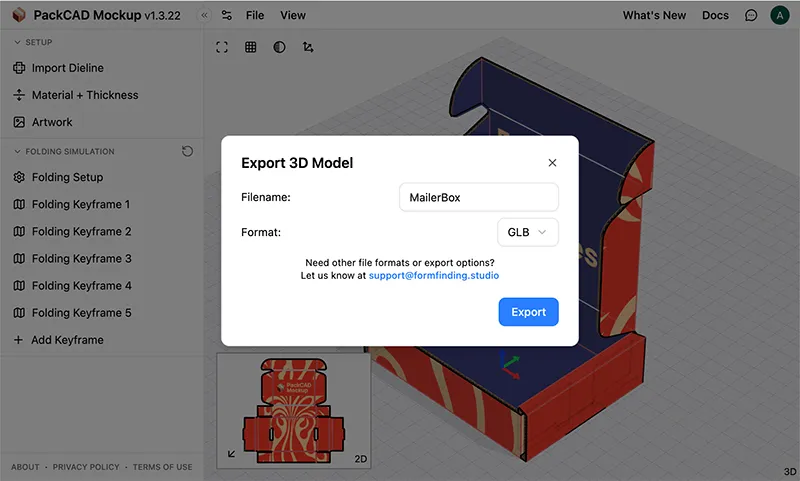
OBJ models can be exported with the Z-axis or Y-axis as the “up” direction (most 3D applications use the convention of Y-axis as “up”). glTF/GLB models default to Y-axis as “up” and units of meters, as defined in the glTF 2.0 spec.
The HTML export option creates a standalone HTML file with the 3D model embedded inside it. Opening the HTML file in a web browser lets you view and interact with the model. The 3D model is stored directly in the file and is not hosted online.
Example files exported from PackCAD Mockup: MailerBox.gltf MailerBox.glb MailerBox_obj+mtl.zip
Export High-Res PNG
Go to File > Export PNG and set the dimensions of your HD rendering (currently up to 4K is supported, let us know if you need a higher resolution). When exporting, you can make the background transparent or set it to a color of your choice, toggle the shadow on or off, and choose the DPI of the exported image.
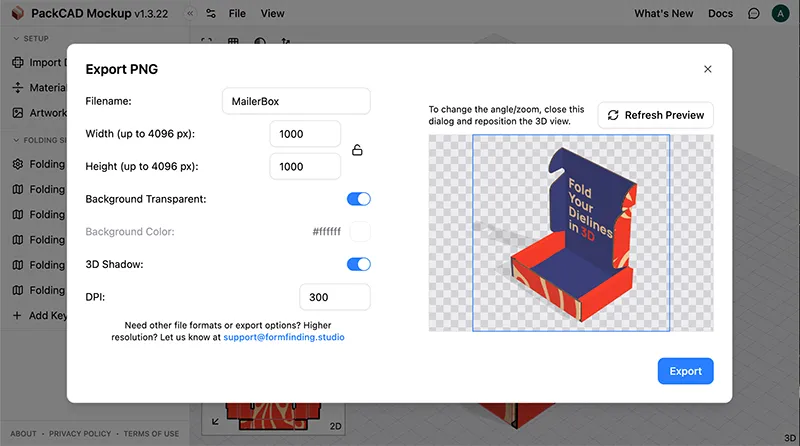
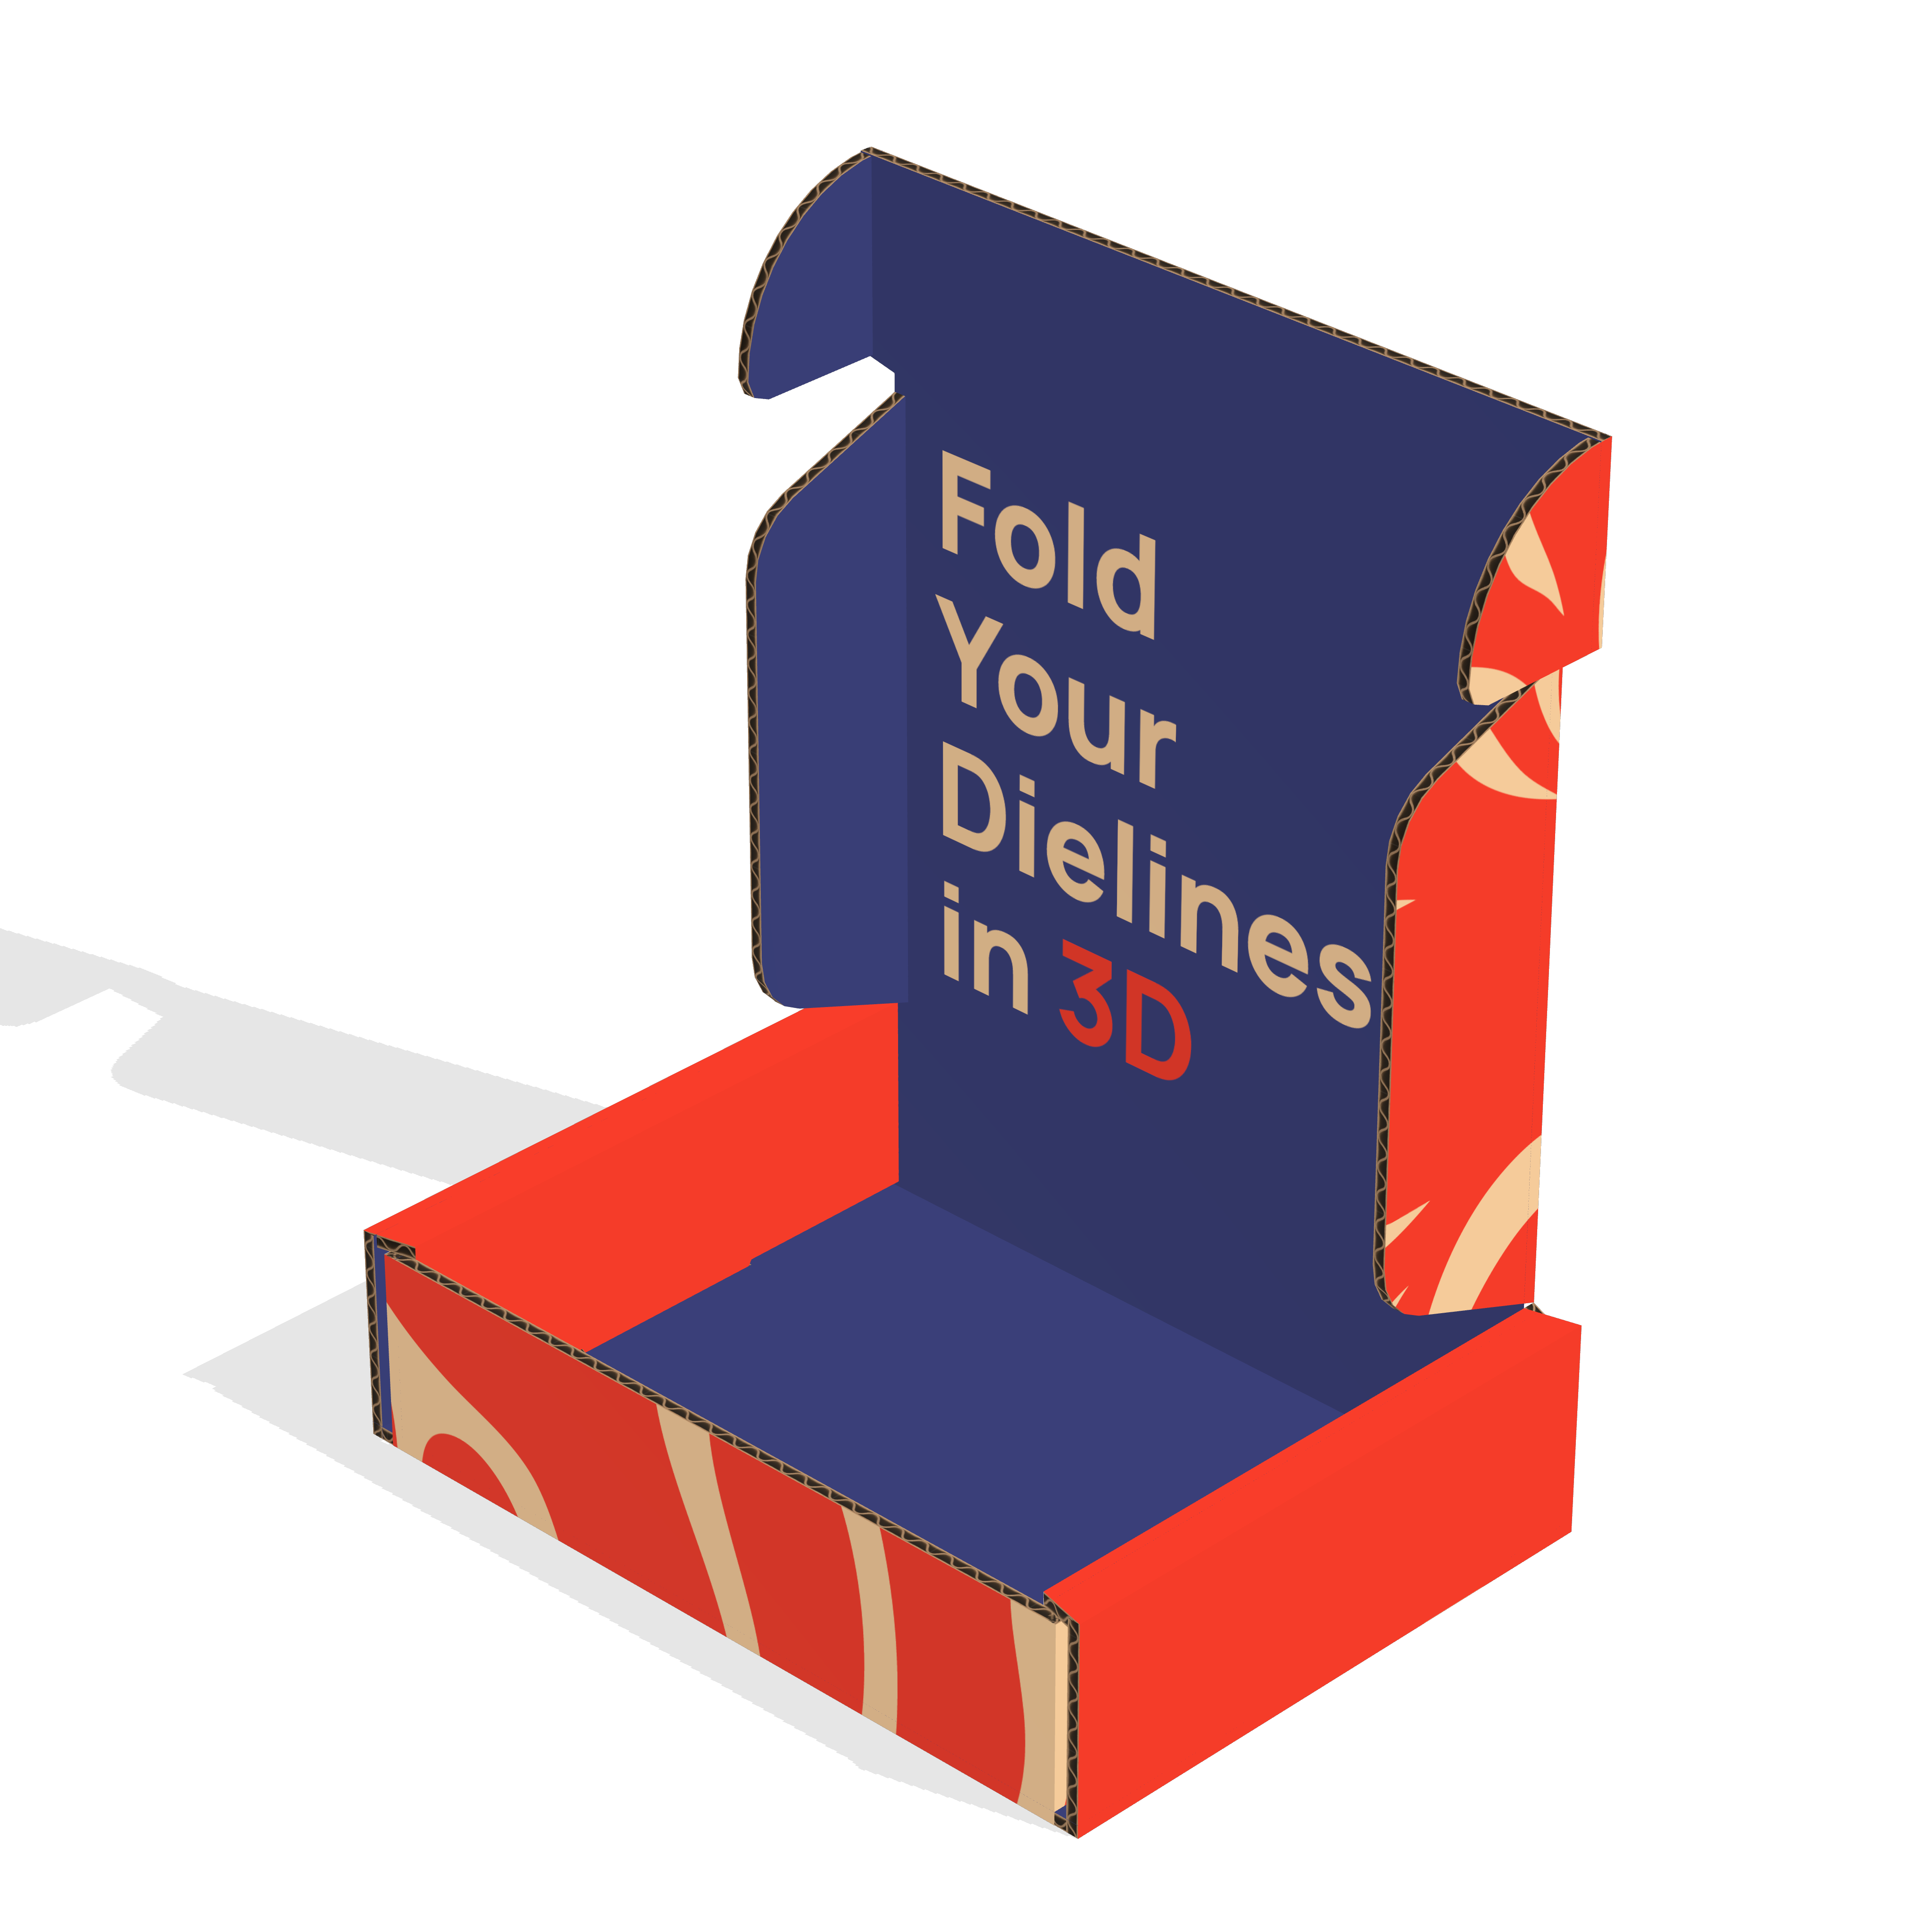
Example 4K PNG with a transparent background exported from PackCAD Mockup: MailerBoxRendering.png