
Curved Folding Packaging Simulation in PackCAD Mockup
PackCAD Mockup is browser-based software for folding dielines into realistic 3D packaging mockups, including designs that fold along curved creases. This guide covers curved folding in PackCAD Mockup, with practical tips for producing accurate 3D results:
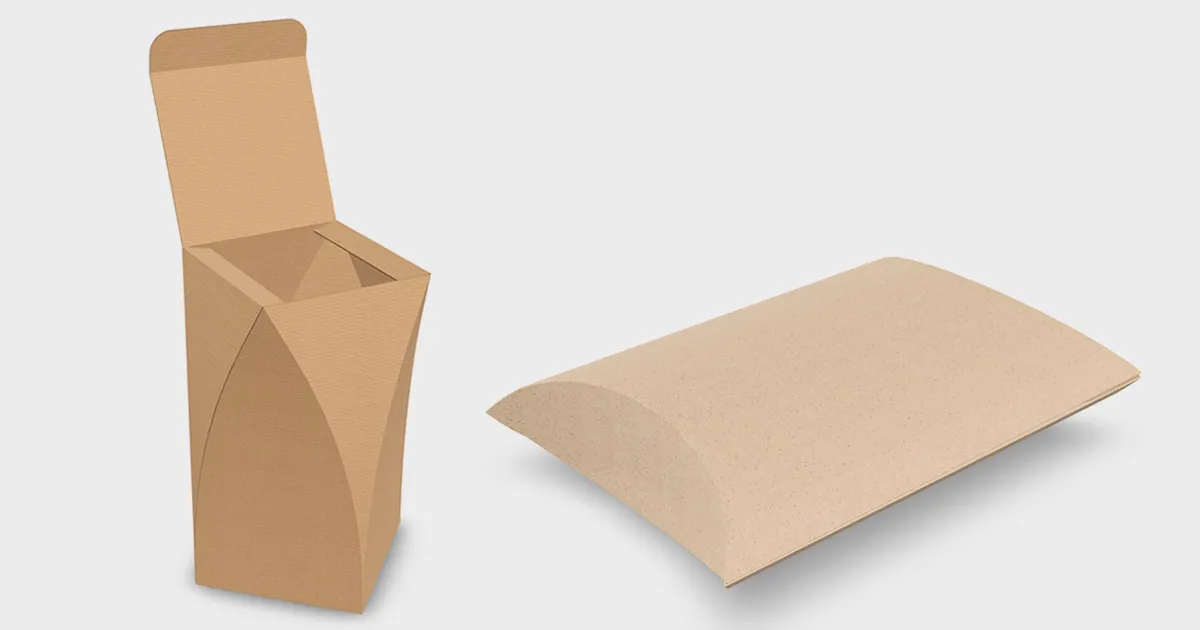
Curved Folding
A curved crease is a crease that follows a curve instead of a straight line. Curved folding is commonly used in packaging design to increase structural rigidity, reduce the number of creases, and elevate the visual appeal of a design. Curved folding is also remarkably efficient: it’s mathematically proven to enclose the most volume for a given amount of material.
When a design folds along a curved crease, the panels adjacent to the curve must bend, as you can see in the image above. This is fundamentally different from folding along a straight crease, where the panels stay flat and pivot about a single hinge. Since PackCAD Mockup keeps panels flat during folding by default, we must adjust the dieline slightly so the curves can fold correctly in the software.
If you haven’t already, read our 3D Packaging Folding Animation guide first. It covers how to set up fold angle constraints and keyframes in PackCAD Mockup, and we’ll build on those concepts here.
Subdivision Creases
To fold curved creases, you’ll need to add extra lines across your dieline file to indicate to PackCAD Mockup which panels should have added flexibility — we call these subdivision creases. Subdivision creases behave like any other crease; they give the design extra hinges so it can approximate a smooth bend through many tiny folds.
You don’t need to draw subdivision lines precisely. Lines that extend past the dieline outline are trimmed automatically when you import the file, so it’s fine for them to overhang.
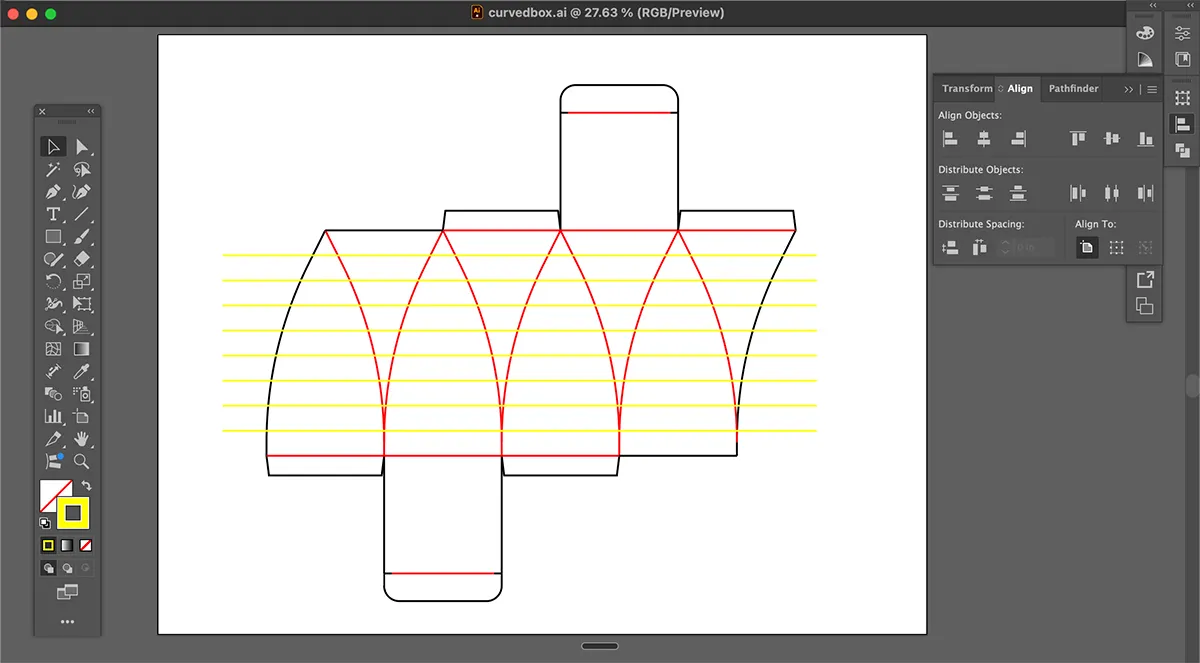
Orient the subdivision creases in the direction you expect the design to bend. Typically, subdivision creases will run perpendicular to curved creases and parallel with any straight creases in the design. As a convention, we’ll draw subdivision creases in yellow (#ffff00) .
Download the example files with subdivision creases here: curvedbox.ai curvedbox.svg and a .json project file that opens directly in PackCAD Mockup: curvedbox.json
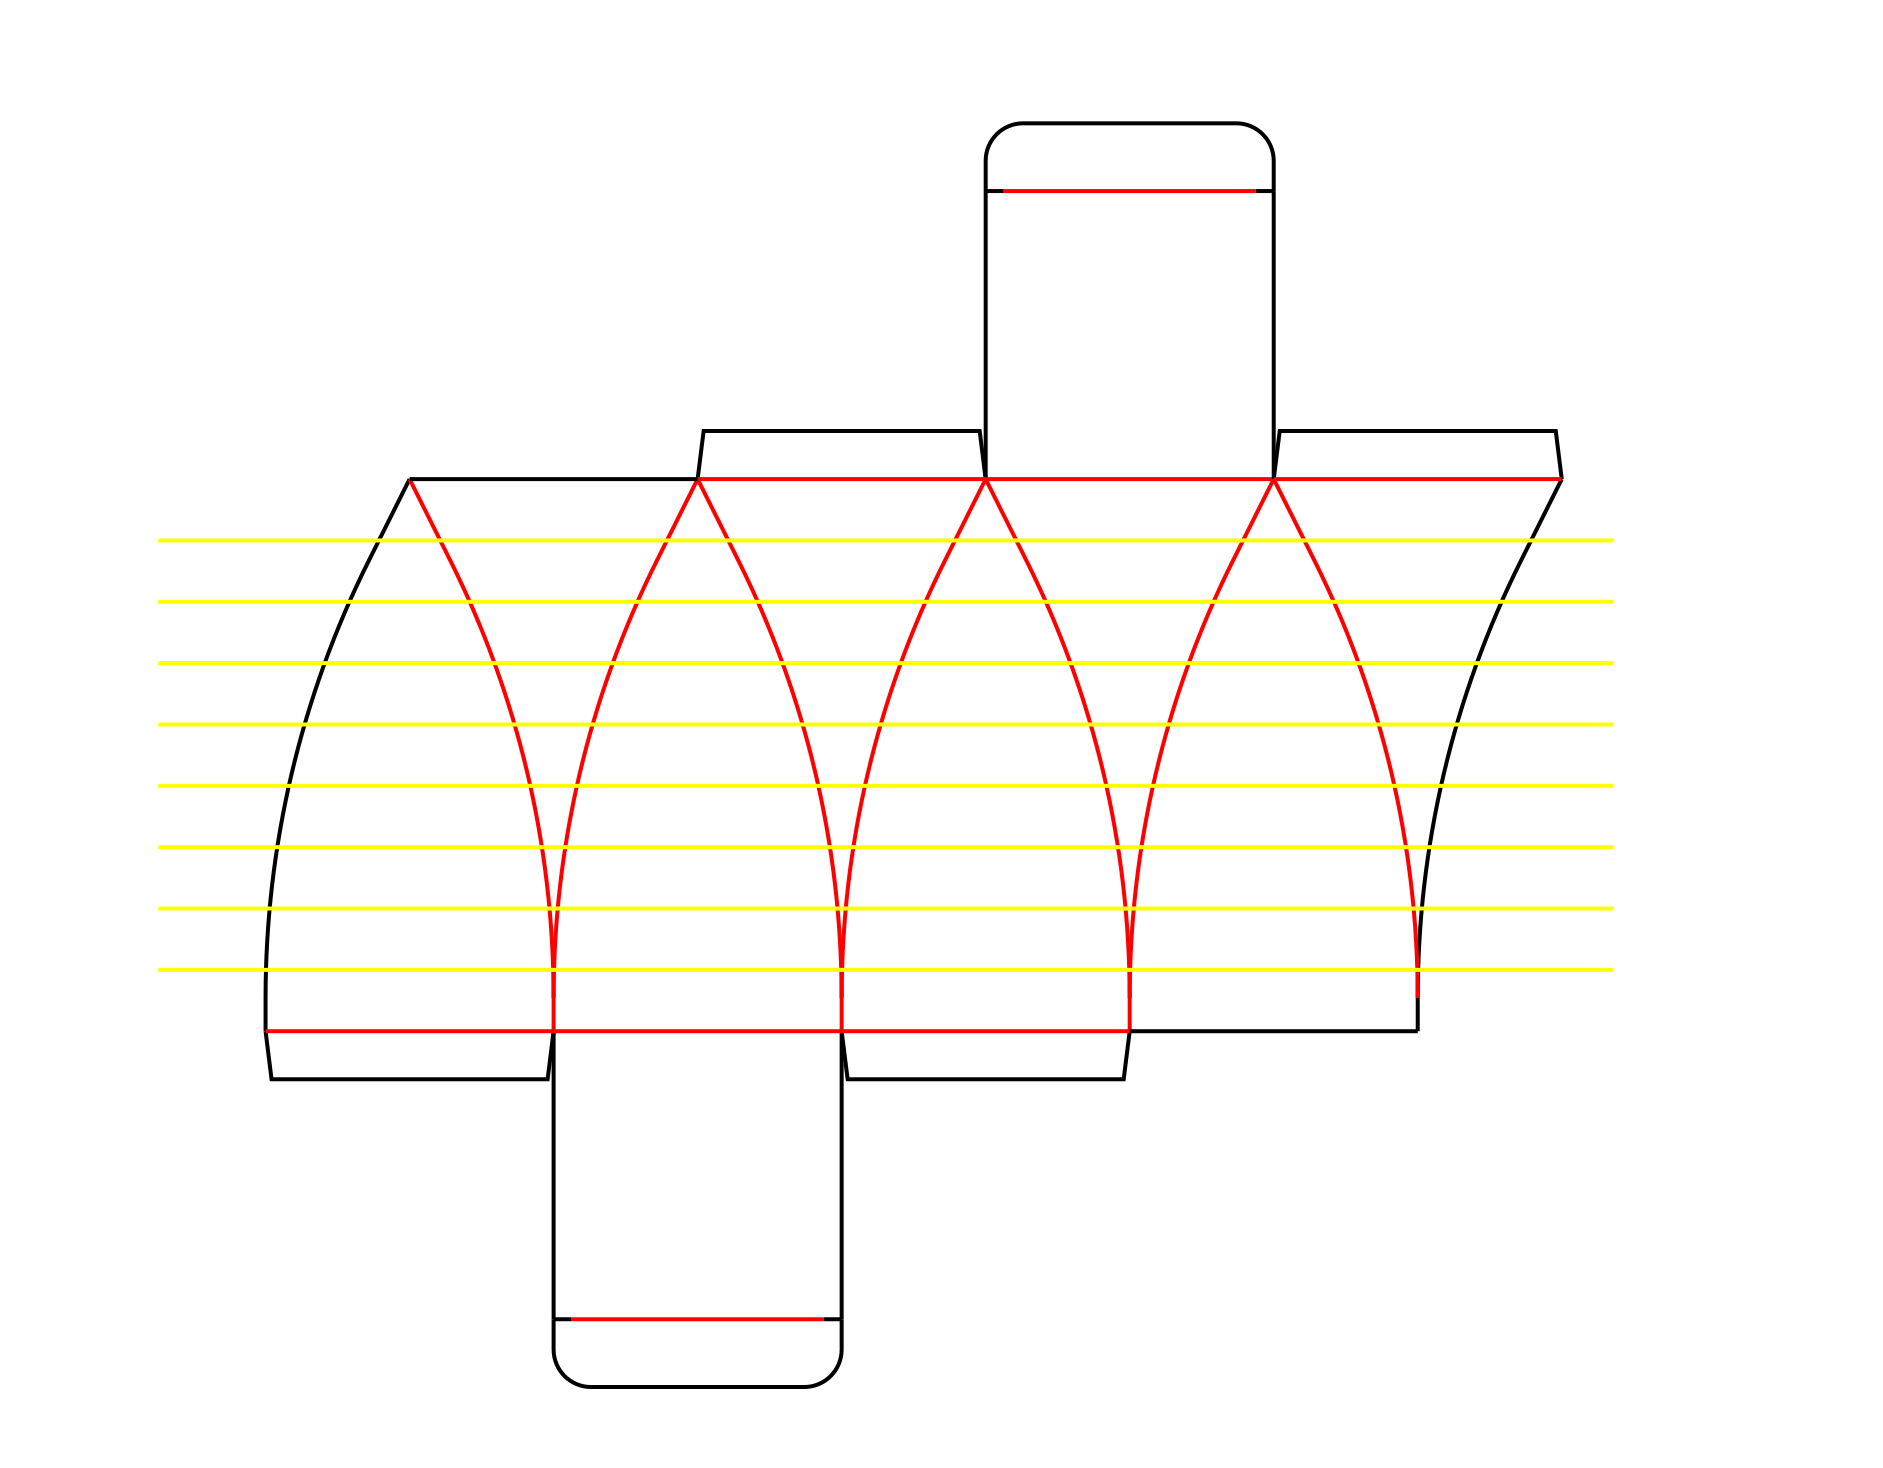
For best results, draw your curved creases as curves, do not manually discretize them into many short, straight segments. Subdivision creases should always be drawn as straight lines.
Example: Pillow Box
The pillow box is one of the most common curved crease designs used in packaging, so we’ll walk through an example of how to fold it in PackCAD Mockup here. Starting with a standard pillow box dieline, add yellow subdivision creases spanning the full height of the dieline. These parallel subdivision creases will allow the pillow box to roll into a tubular shape.
Download the pillow box example files here: pillowbox.ai pillowbox.svg and a .json project file that opens directly in PackCAD Mockup: pillowbox.json
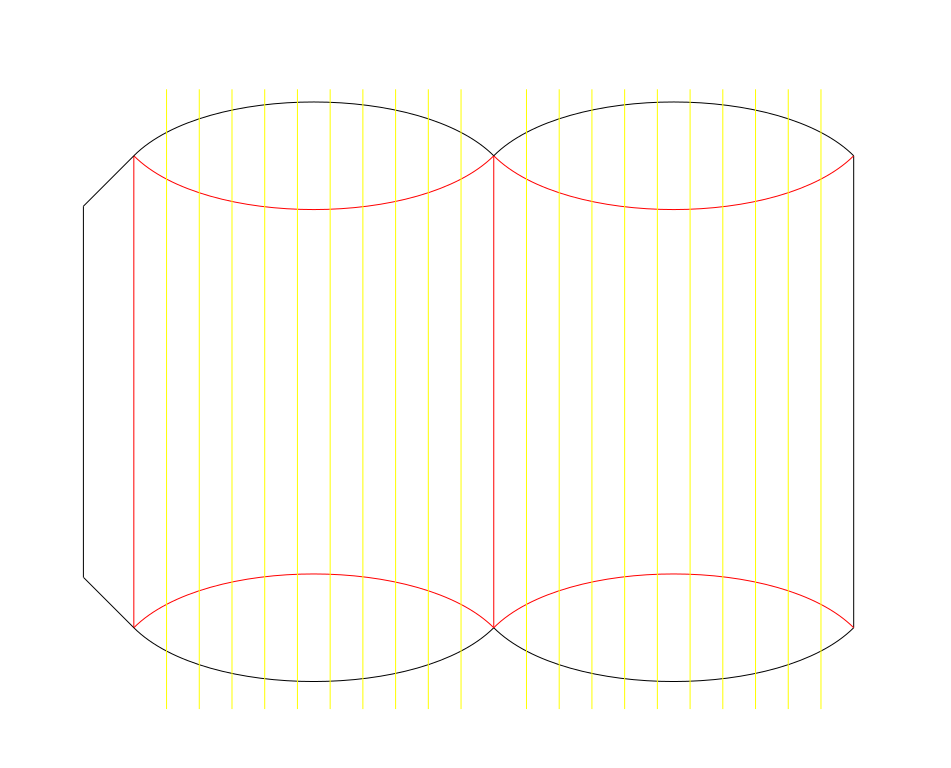
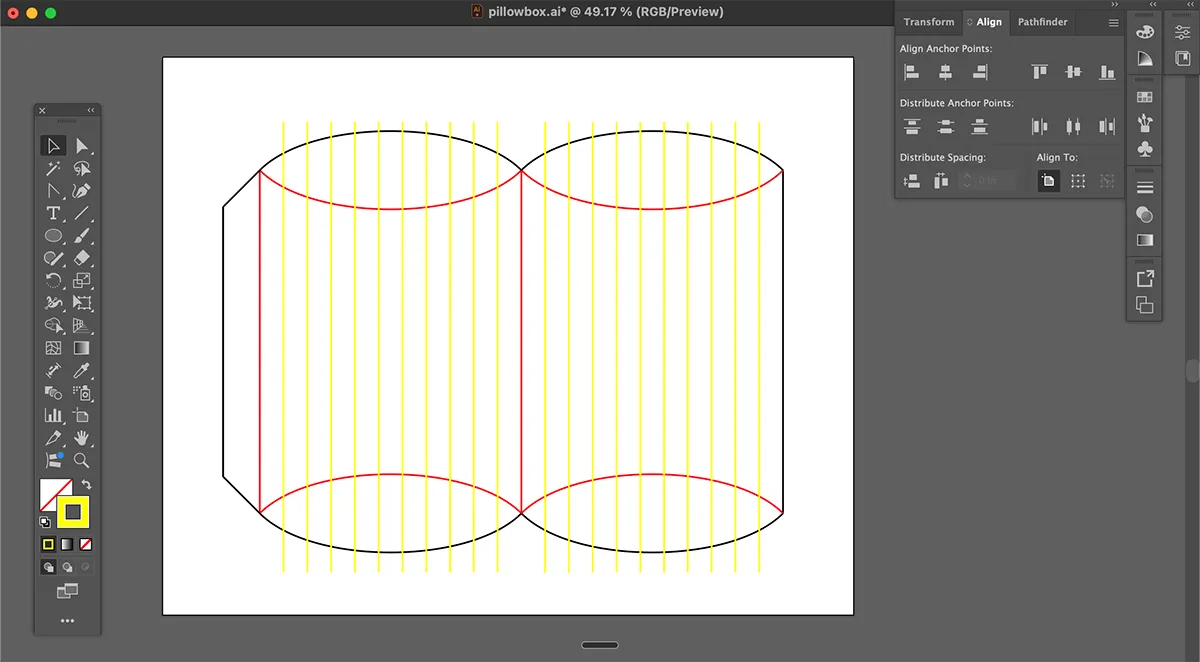
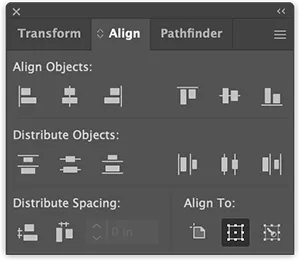
If you are working in Adobe Illustrator, you can use the Distribute Spacing tool in Illustrator’s Align menu to evenly space subdivision creases across the dieline:
After importing the pillow box SVG into PackCAD Mockup, select a Bottom Panel in the Folding Setup:
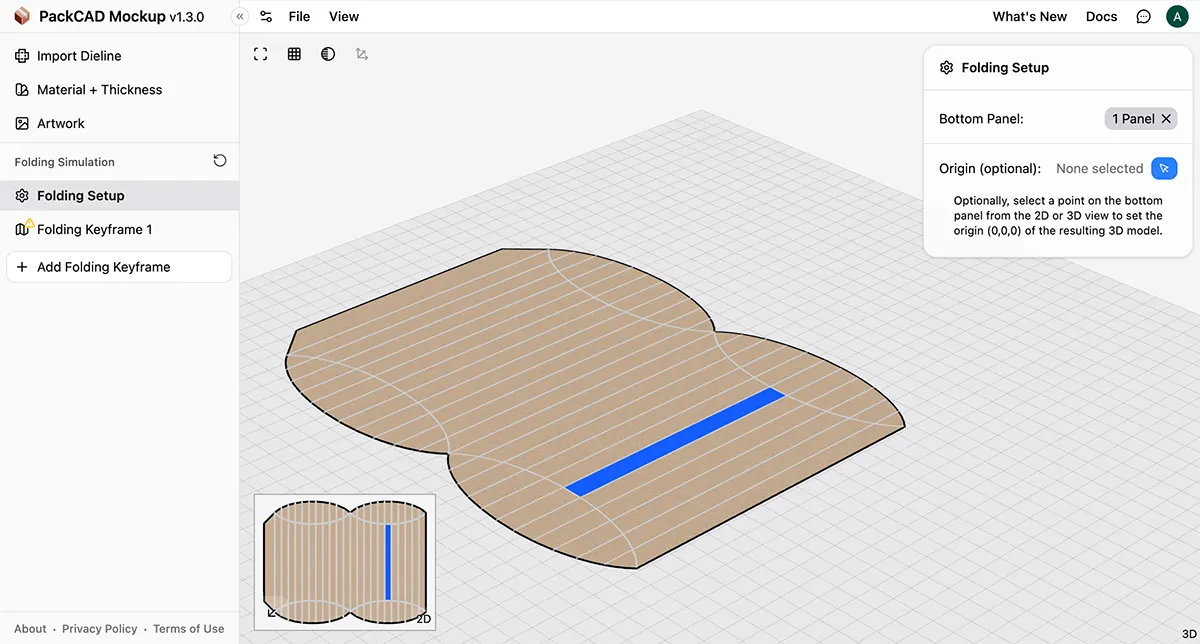
Use an even number of subdivision creases so that you can select the center of your curved panel as the Bottom Panel in the Folding Setup.
Folding Curved Creases
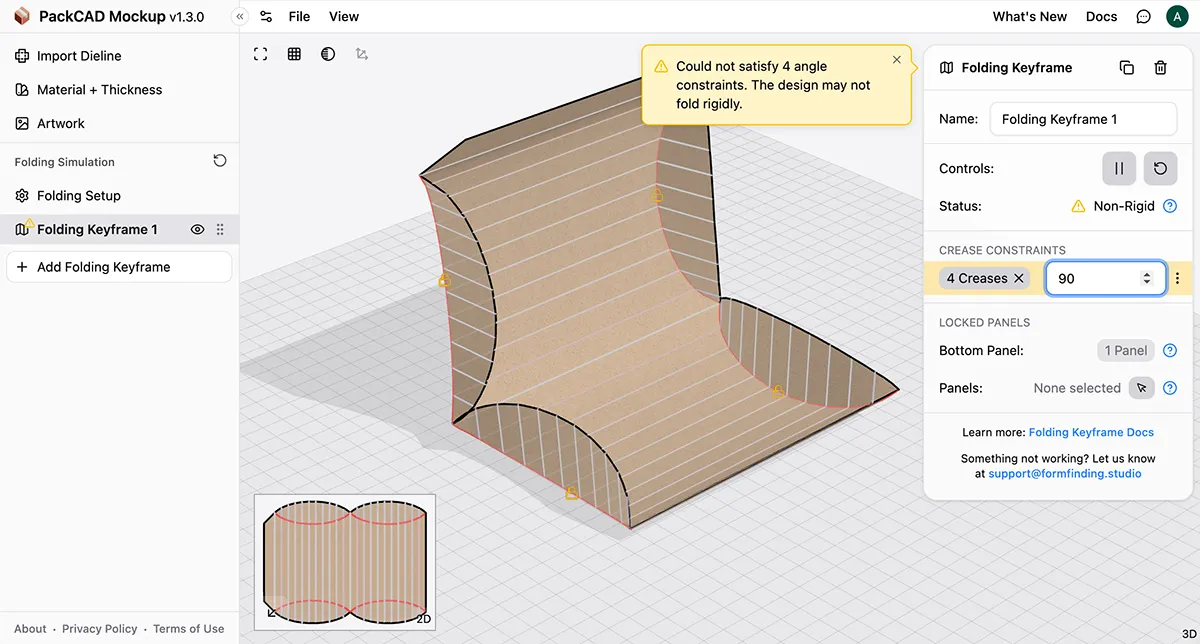
Next, add a folding keyframe by clicking Add Keyframe. The fold angle along a curved crease often isn’t uniform — it can vary from one end of the curve to the other depending on the geometry of the crease. Rather than trying to guess what the fold angle should be along all segments of the curved crease, set a folding constraint on just one section of the curve and allow PackCAD Mockup’s origami simulation to solve for the rest of the angles. In the example below, we select the center section of each of the four curved creases and set the target fold angle to 90 degrees:
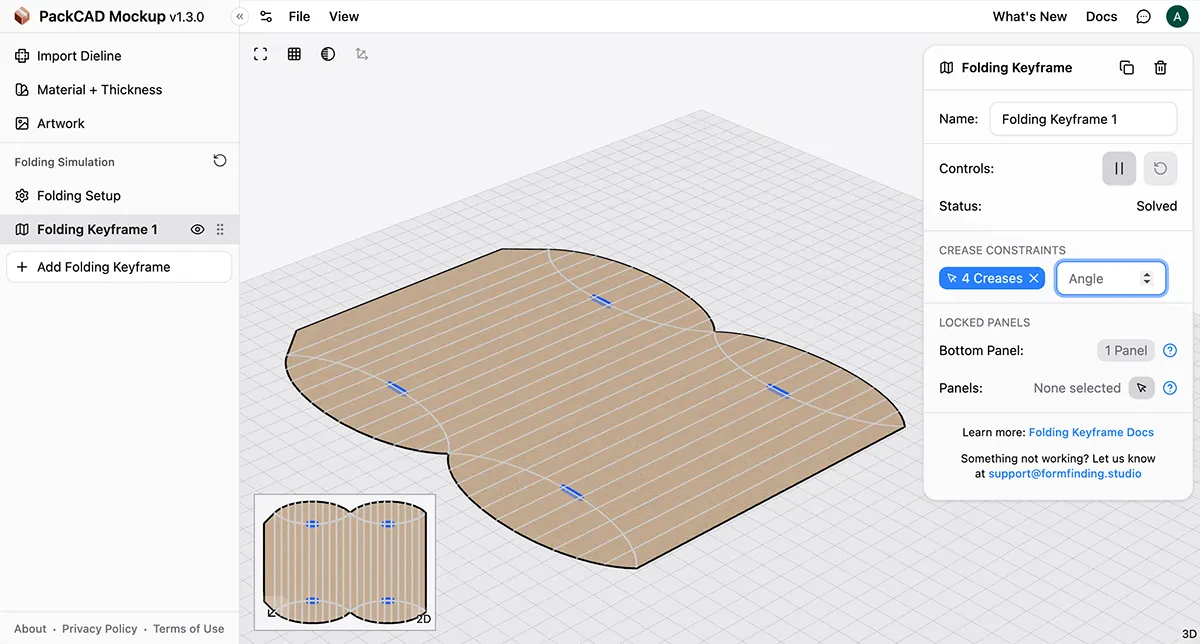
Set the fold angle on a single short segment rather than the whole curved crease. PackCAD Mockup’s folding simulation will solve for the fold angle along the rest of the crease.
Non-Rigid Warnings
Because curved folds inherently involve bending, the Folding Keyframe status will often show and warn that the design may not fold rigidly, even when the result looks correct. For curved crease designs, a non-rigid warning status is somewhat expected (curved folding is non-rigid because of the panel bending), so you can usually ignore these warnings as long as your result looks correct. See Simulation Status for more info.
A status is expected for curved crease designs and can usually be ignored if the 3D result looks correct. If the design is visibly distorted or stuck, the warning points to a real geometry problem — try adding more subdivision creases or simplifying your fold angle constraints.
Final Result
After adding another Folding Keyframe, we can create a smooth animation of our pillow box folding:
More subdivision creases produce smoother results in the folded model. If a panel looks too faceted in the 3D view, add more subdivision creases and re-import.
What’s Next
[May 2026] The process we’ve outlined in this tutorial is a short-term solution to supporting curved folding in PackCAD Mockup. We’re planning on adding curved folding support to PackCAD’s origami simulation directly, so future versions of PackCAD Mockup will handle curved creases without requiring subdivision creases.
If you’d like to follow along as this work progresses, sign up for our mailing list.