PackCAD Mockup User Interface
PackCAD Mockup is an online tool that converts flat dielines into realistic 3D packaging mockups. This guide walks through the app’s layout, menus, and key controls.
The Main Layout
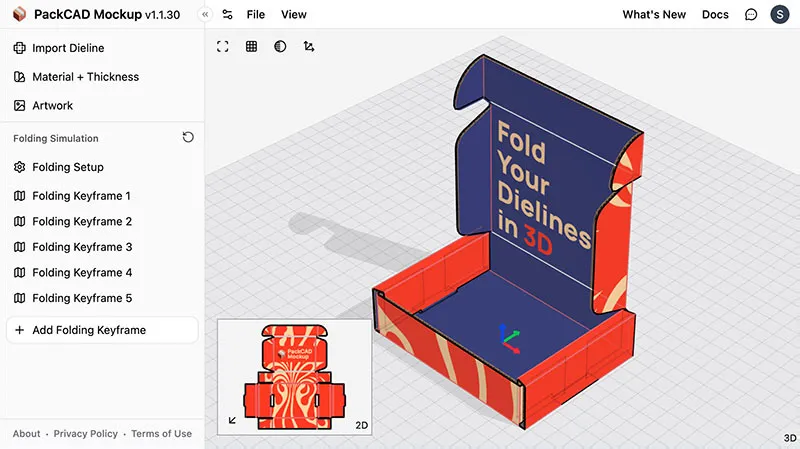
The interface is organized into four main areas:
- Header - The top bar with Preferences ( ), File and View menus, and Account controls.
- Left Menu - A vertical list of operations that define your project, from importing a dieline through folding.
- 2D and 3D Views - The center of the screen, where you see your dieline and folded model.
- Detail Menus - When you select an operation in the left menu, its detail menu appears on the right side of the screen with controls for that step.
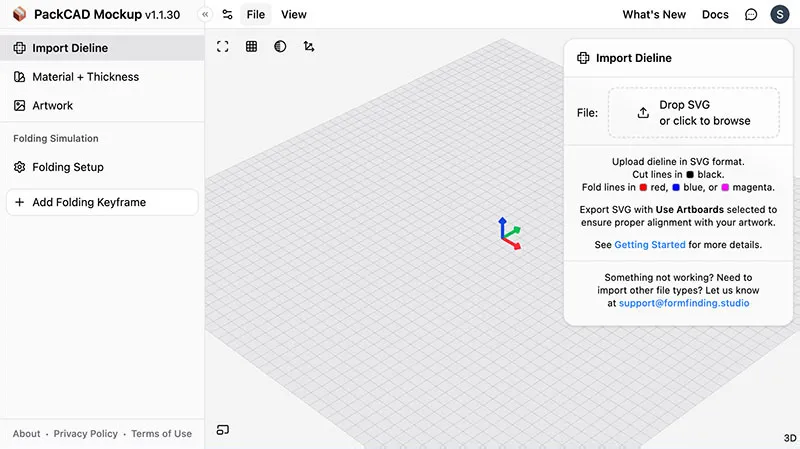
Drag a dieline (SVG) or project file (JSON) directly into the app to open it. You can also drag artwork (PNG/JPG) into your design at any time.
Header
Preferences
Click in the header to open the Preferences menu. Preferences let you set defaults that persist across sessions. Settings changed elsewhere in the app (e.g., adjusting the view layout or thickness from a detail menu) are temporary and will reset on your next visit. To make a setting persistent, set it here.
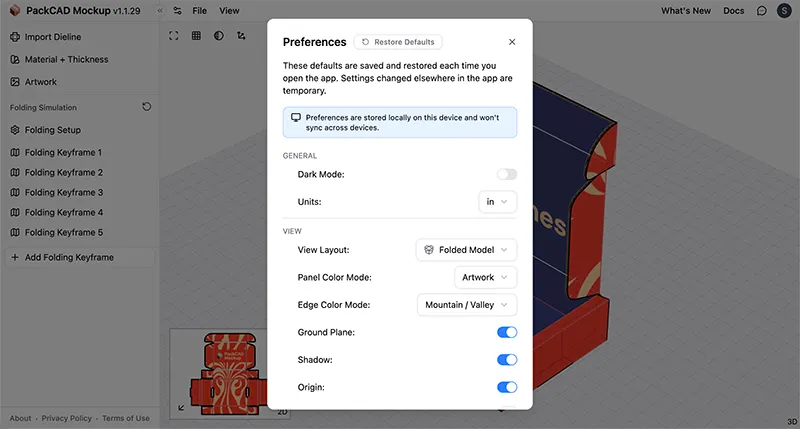
The Preferences menu is organized into four sections:
- General - Set the default Units (inches, millimeters, centimeters) and Dark Mode toggle.
- View - Set defaults for View Layout, Panel Color Mode, and Edge Color Mode, Ground Plane, Shadow, and Origin visibility, and Background Color.
- Material & Thickness - Set the default Material type, Flute Size and Flute Angle (for corrugated cardboard), Thickness, and thickness Offset Direction.
- Camera - Set the default Camera Type (Perspective or Orthographic) and Field of View (for perspective cameras).
Preferences are saved locally on your device and won’t sync across different devices or browsers. To reset everything back to defaults, click the Restore Defaults button at the top of the menu.
File Menu
The File menu contains project and export actions:
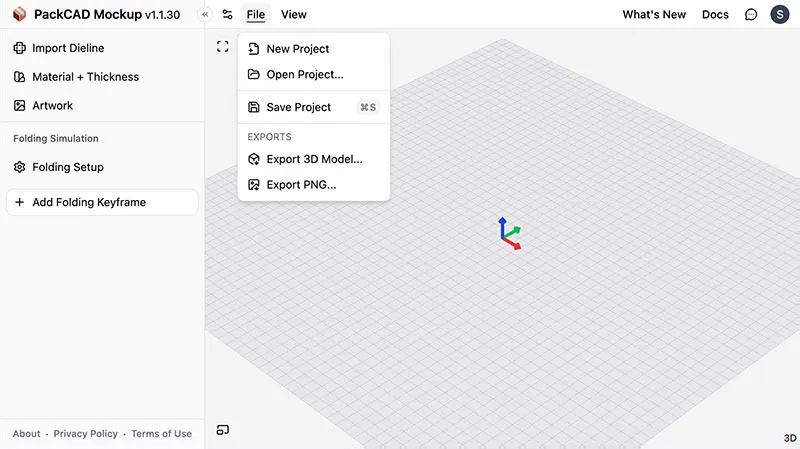
- New Project - Start a fresh project.
- Open Project… - Load a previously saved project file (JSON).
- Save Project (
Ctrl/Command + S) — Save your current project as a JSON file. - Export 3D Model… - Export your folded design as a 3D file (OBJ, glTF, GLB, or HTML).
- Export PNG… - Export a high-resolution rendering of your 3D model.
View Menu
The View menu controls how your design is displayed:
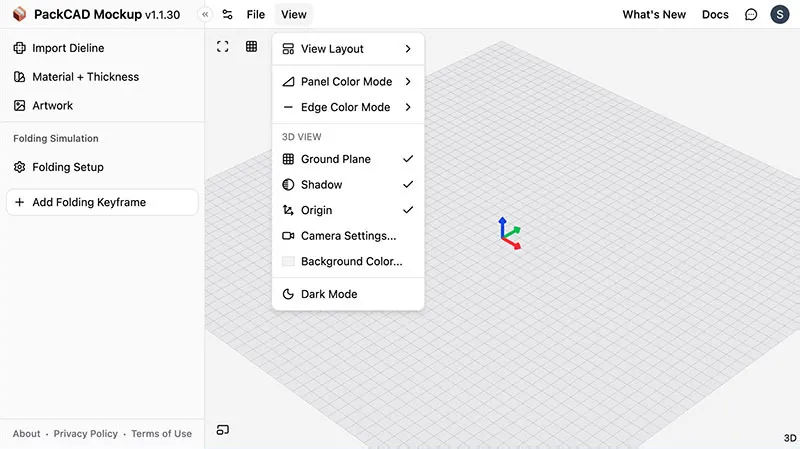
- View Layout - Switch between Folded Model (3D focused), Dieline (2D focused), Split Horizontally, and Split Vertically. You can also use the
2and3hotkeys for the dieline and folded model views. - Panel Color Mode - Choose how panels are colored: Artwork (shows your uploaded textures), White, or Multicolor (each panel a different color, useful for verifying your dieline was parsed correctly).
- Edge Color Mode - Choose how fold and cut lines are displayed: Mountain / Valley (creases are colored red or blue based on their fold direction and angle; cut lines are black), Black (cut lines are solid, fold lines are dashed), or Hidden (don’t render crease or cut lines).
- 3D View - Toggle the Ground Plane, Shadow, and Origin visibility. Open Camera Settings… or Background Color… dialogs.
- Dark Mode - Toggle between light and dark themes.
Other Header Controls
On the right side of the header, you’ll find:
- What’s New - View the changelog. A green dot appears when there are unread updates.
- Docs - Opens the documentation site.
- Feedback - Send feedback or report an issue.
- Account - Sign in, view your subscription, or manage your account.
Left Menu
The left menu lists the operations that make up your project. Operations are applied in order from top to bottom, and each one transforms your design in some way.
The standard operations are:
- Import Dieline - Upload your dieline SVG file.
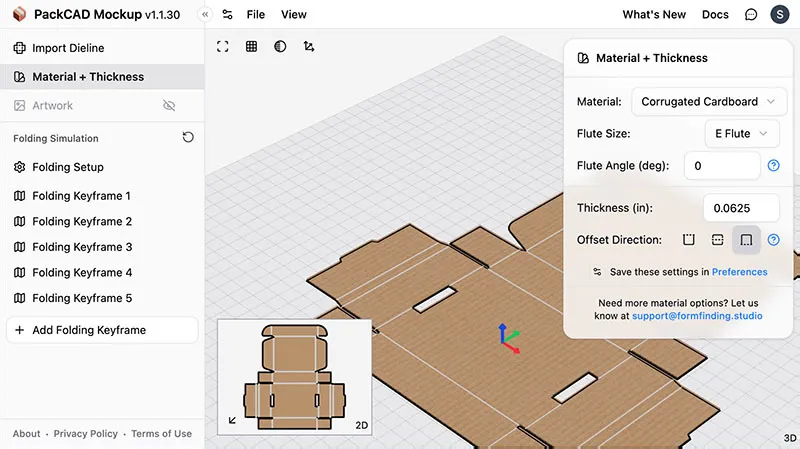
- Material + Thickness - Choose a material type and thickness.
- Artwork - Upload exterior and interior artwork (PNG/JPG).
- Folding Setup - Select the bottom panel and (optional) origin point.
- Folding Keyframes - Define fold angles and build a folding animation. You can add multiple keyframes using Add Folding Keyframe at the bottom.
Click any operation to select it and open its detail menu on the right. See Getting Started for a full walkthrough of these steps.
The left menu is collapsible. Click the toggle in the header to expand or collapse it.
Enable / Disable
Hover over an operation to reveal its visibility toggle ( ). Click it to disable the operation ( ) and temporarily remove its effect from the design without deleting it. Click again to re-enable.
Reordering Keyframes
Folding keyframes can be reordered by grabbing the grip ( ) and dragging them to a new position. Keyframes are applied sequentially, so their order determines the folding animation sequence.
Detail Menus
When you select an operation in the left menu, its detail menu appears on the right side of the screen. Each detail menu contains the settings and controls specific to that operation.
For example:
- The Import Dieline detail menu shows the uploaded file, dimensions, and unit settings.
- The Material + Thickness detail menu lets you choose a material type, set a thickness value, and control the offset direction.
- The Artwork detail menu lets you upload and manage exterior and interior artwork files.
- The Folding Setup detail menu is where you select the bottom panel and origin point.
- The Folding Keyframe detail menu contains simulation controls, fold angle constraints, and options like Enforce Prior Constraints. See Folding Simulation for a detailed guide.
Select any number input and scroll to nudge the value up or down. This works for fold angles, thickness, and other numeric fields.
Alerts
If an operation has errors or warnings, an alert badge appears on the operation in the left menu and on the upper-left corner of its detail menu. Click the badge to see the error/warning messages.
2D and 3D Views
The center of the screen shows your design in 2D (the flat dieline) and 3D (the folded model). There are four view layouts, controlled from the View menu or keyboard shortcuts:
- Folded Model (
3hotkey) — 3D view fills the screen, with a small 2D picture-in-picture in the corner. - Dieline (
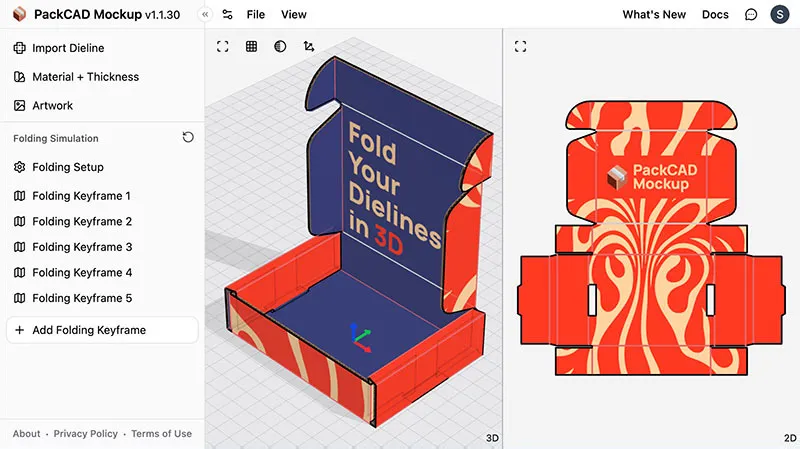
2hotkey) — 2D view fills the screen, with a small 3D picture-in-picture in the corner. - Split Horizontally - 3D on the left, 2D on the right.
- Split Vertically - 3D on top, 2D on bottom.
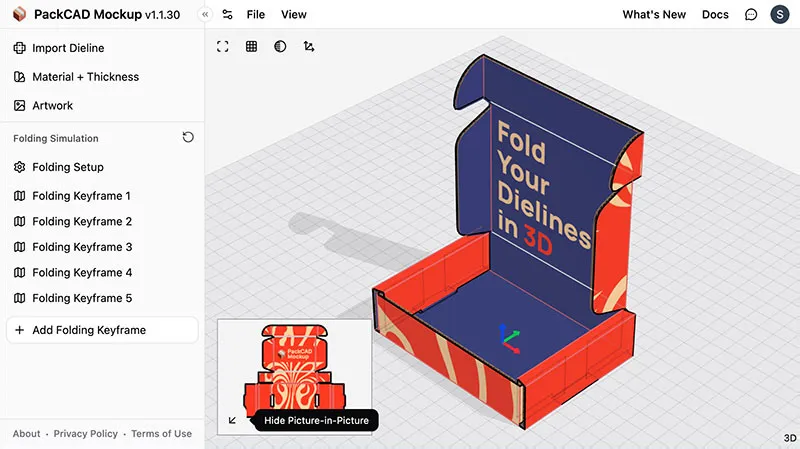
Picture-in-Picture
In the Folded Model and Dieline layouts, the smaller view appears as a picture-in-picture window in the bottom-left corner. Click it to quickly swap which view is focused (or use the 3 and 2 hotkeys). You can also hide the picture-in-picture window and restore it later using the toggle button.
Often, it is easier to select creases from the 2D view when editing a folding keyframe.
3D View Controls
A small toolbar appears in the top-left of the 3D view containing the following controls:
- Center View - Reset the center/zoom of the camera to fit your model.
- Ground Plane - Toggle the ground plane grid visibility (z = 0).
- Shadow - Toggle the shadow visibility beneath your model.
- Origin - Toggle the origin indicator visibility (x = 0, y = 0, z = 0).
Camera interaction: Click and drag to orbit, scroll to zoom, and right-click and drag (or two-finger drag) to pan.
2D View Controls
A small toolbar appears in the top-left of the 2D view containing the following controls:
- Center View - Reset the center/zoom of the camera to fit your dieline.
Interaction: Click and drag to pan, scroll to zoom.
Keyboard Shortcuts
The following hotkeys are available throughout the app:
| Shortcut | Action |
|---|---|
2 | Switch to dieline view |
3 | Switch to folded model view |
R | Replay the current keyframe (or the full folding animation if no keyframe is selected) |
Ctrl/Command + A | Select all creases (when editing a folding keyframe) |
Ctrl/Command + S | Save project |
Help and Support
If you ever need help using PackCAD Mockup, feel free to reach out at support@formfinding.studio. We welcome feedback, feature requests, and bug reports!