PackCAD Mockup 3D Folding Simulation
PackCAD Mockup is an online tool that converts flat dielines into realistic 3D packaging mockups. This guide introduces PackCAD’s folding simulation and explains how to configure fold angles and build keyframe-based folding animations for your designs.
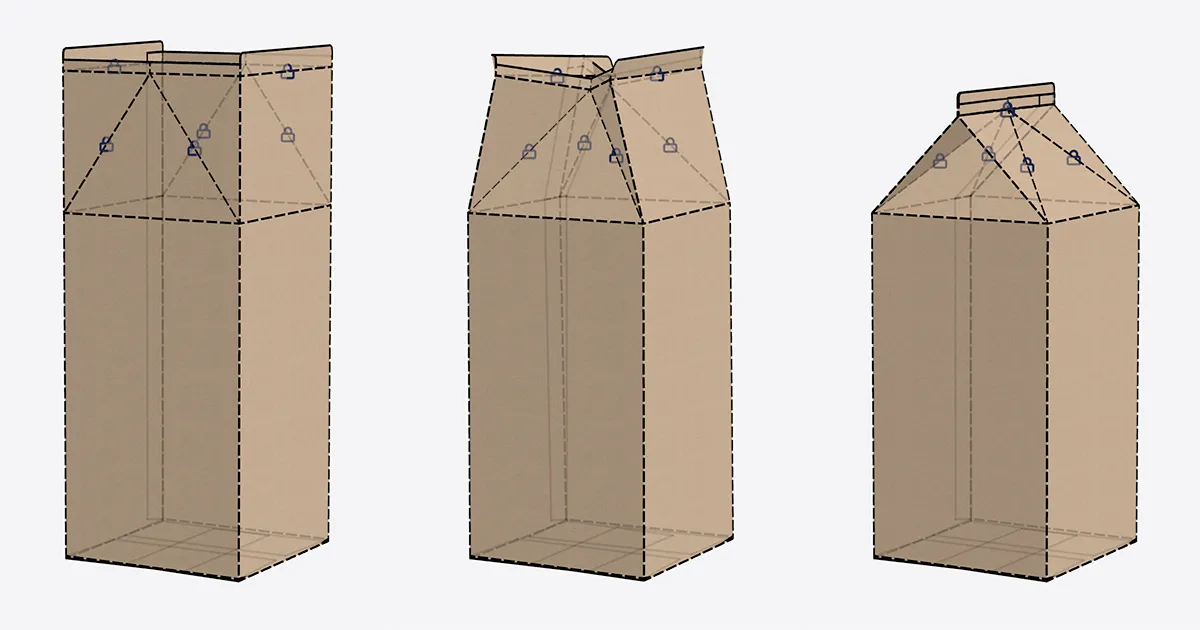
Follow along with our milk carton example. Start from the dieline milk_carton.svg , or open the completed project milk_carton.json directly in PackCAD Mockup.
How It Works
PackCAD Mockup uses an origami-inspired folding simulation to transform flat 2D dielines into folded 3D structures. It models your dieline as a system of rigid panels connected by hinges (fold lines), then solves for the 3D shape that satisfies your target fold angles.
You control the simulation by selecting creases in your dieline and assigning them target fold angles. The solver runs in real-time, so you can see the 3D model update as you adjust angles. Because packaging structures don’t always fold in a single step, you can break the folding process into multiple Folding Keyframes; each folding keyframe captures a stage of the folding process, and together they form an animation from flat to fully folded.
Folding Setup
Before creating any folding keyframes, you need to configure the Folding Setup step. Select Folding Setup from the left menu to open the Folding Setup detail menu on the right.
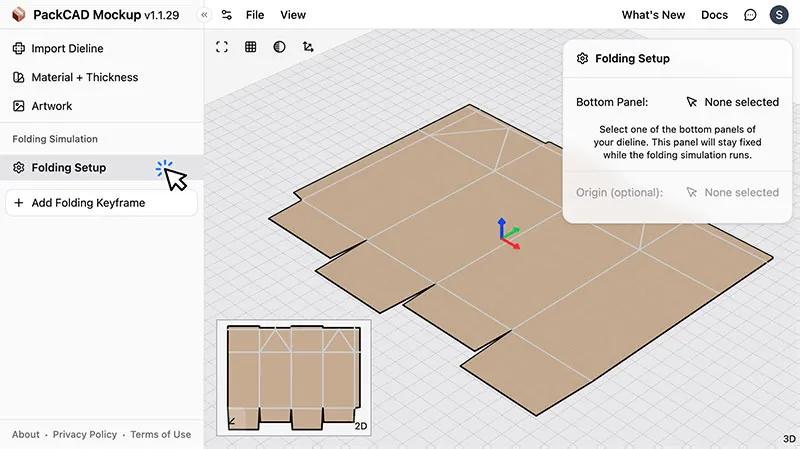
Bottom Panel
Select one of the bottom panels of your dieline. This panel will stay fixed to the ground plane while the folding simulation runs. Click a panel in the 2D or 3D view to select it.

Origin Point (Optional)
Optionally, select a point on the bottom panel to set the origin (0,0,0) of the resulting 3D model. This is useful if you plan to export the model and need a specific origin reference point.
Folding Keyframe
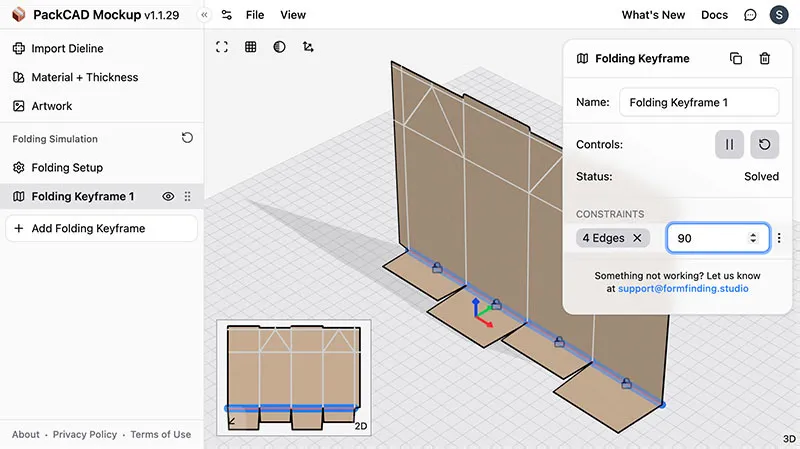
Once the Folding Setup is complete, click the Add Folding Keyframe button at the bottom of the left menu. A new keyframe will appear in the left menu, and the Folding Keyframe detail menu will open on the right.
Each keyframe represents a stage of the folding process. For simple designs, a single keyframe with all creases set to 90° (or -90°) may be all you need. For more complex designs (or to create a folding animation) you can add multiple keyframes, each with a different set of fold angles.
Adding Constraints
Within the Folding Keyframe detail menu, add a new folding constraint by selecting fold line(s) in the 2D/3D views and entering a target fold angle:
- Select crease(s) - Click on creases in the 2D or 3D view. You can select multiple creases to assign them the same fold angle at once. Use
Ctrl/Command + Ato select all creases. - Enter a fold angle - Type a target fold angle in the input field that appears. Fold angles range from -180° to +180°.
- Confirm - Press
Enteror click elsewhere to save the constraint.
Press Ctrl/Command + A to select all creases at once. Use this to quickly
assign the same angle to every crease.
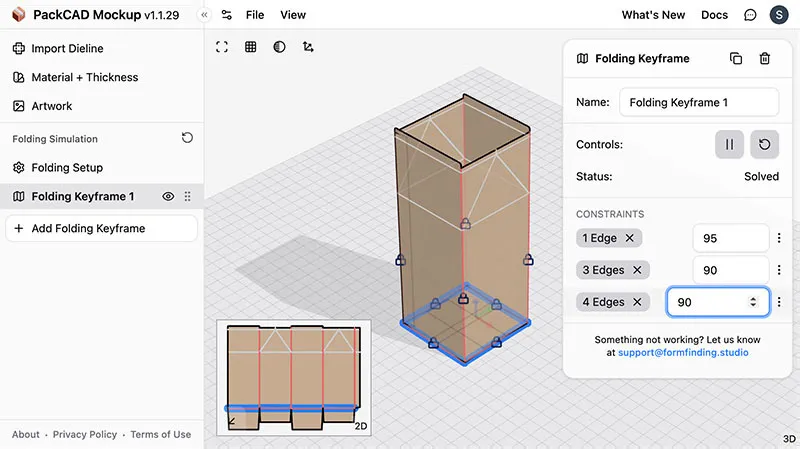
You can continue adding constraints to the Folding Keyframe by selecting additional groups of creases and inputting a fold angle. Each constraint will show up as a list item in the Folding Keyframe detail menu.
Editing Constraints
Each folding constraint shows:
- Crease count - A tag showing how many creases are in the group. Hover over the tag to highlight those creases in the 2D/3D views. Click the tag to enter edit mode, where you can add or remove creases from the group directly in the 2D or 3D view.
- Angle - The target fold angle. Edit it at any time to update the simulation.
- - More options to Edit Creases, Enable/Disable, and Delete the constraint group.
Select the number input and scroll to adjust the angle incrementally. You can
also use the Up/Down arrow keys.
Simulation Controls
The Folding Keyframe detail menu includes controls at the top for managing the simulation:
- Play / Pause
- Start or pause the simulation. The solver runs continuously when playing, updating the 3D model in real time.
- Step Forward - Advance the simulation by one step (available when paused). Useful for watching the folding process in slow motion.
- Reset / Replay - Reset the simulation to
its starting state and re-run it. Press
Ras a keyboard shortcut.
Simulation Status
Below the controls, a status indicator shows the current state of the simulation:
- Waiting… - The simulation is paused because an earlier keyframe hasn’t finished solving yet. Once the prior keyframe converges, this keyframe will resume automatically.
- Solving… - The simulation is actively computing the folded shape.
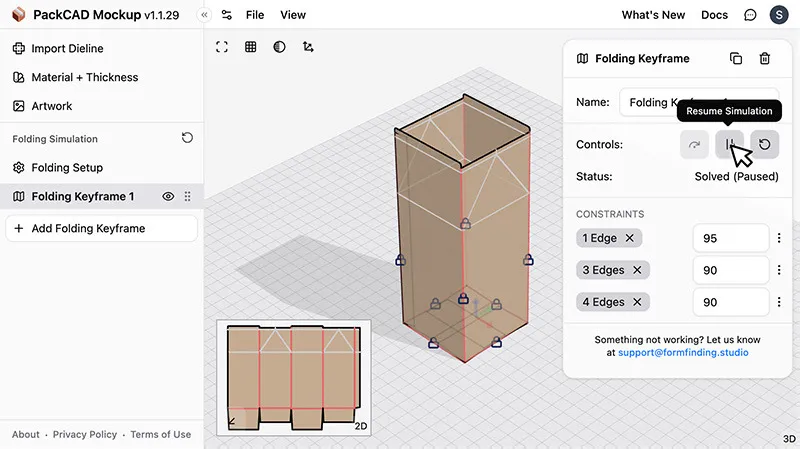
- Paused - The simulation has been paused by the user.
- Solved - The simulation has finished and all target fold angles have been reached.
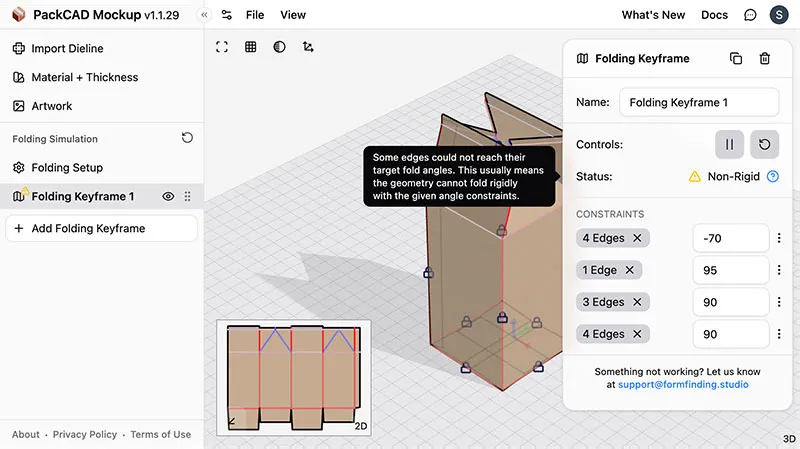
- Non-Rigid - The simulation has finished, but some creases could not reach their target fold angles or there was some stretching/bending of the design’s panels in order to get to the final 3D state. This usually means the geometry cannot fold rigidly with the given constraints. You may need to adjust your fold angles, locked panels, or dieline geometry to resolve this.
If you pause the simulation after it has finished, you’ll see a combined status like Solved (Paused) or Non-Rigid (Paused).
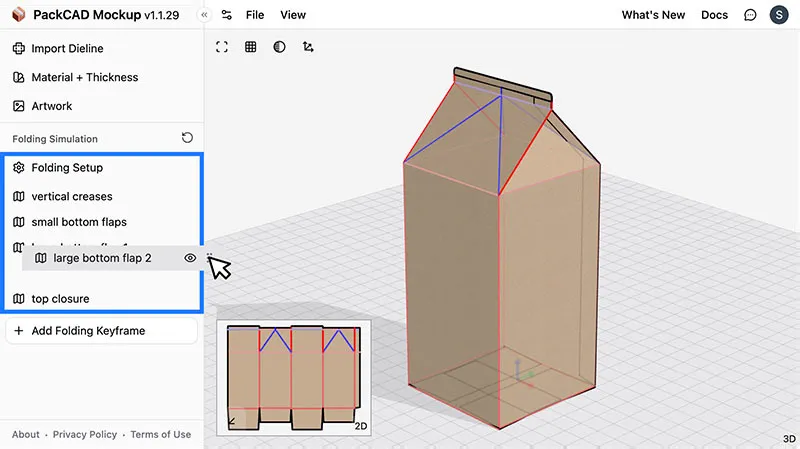
Working with Multiple Keyframes
You can add multiple keyframes to create a folding animation. Each keyframe is listed in the left menu.
Keyframe Order
Keyframes are applied sequentially — the simulation processes them in the order they appear in the left menu. Grab the grip ( ) to drag-and-drop keyframes to reorder them.
Enforce Prior Constraints
PackCAD Mockup attempts to automatically satisfy prior folding constraints as new keyframes are added, so in most cases creases folded in earlier keyframes will hold their shape without any extra configuration. But if you notice previously folded regions becoming floppy in later keyframes, two features can help: Enforce Prior Constraints works at the crease level, re-applying crease constraints from earlier keyframes, while Locked Panels (next section) works at the panel level, freezing entire panels in place. These features can be used separately or combined.
The Enforce Prior Constraints toggle is available on every keyframe after the first. When enabled, it explicitly re-applies the fold angles from earlier keyframes as constraints in the current keyframe’s simulation. This way, creases that were already folded stay constrained to their target angles instead of relaxing.
In the video below, toggling Enforce Prior Constraints improves the rigidity of the sides while the top closure folds:
Locked Panels
Locked Panels pins panels to their starting position for a keyframe. In the example below, the carton’s side panels are locked in place while the top closure folds:
- Bottom Panel - The bottom panel chosen in Folding Setup is always locked during folding. It’s shown here as read-only and can only be changed from the Folding Setup menu.
- Panels - Click and select any additional panels in the 2D or 3D views to lock them in place for this keyframe. Locked panels apply only to the current keyframe.
Copying Keyframes
To duplicate a keyframe, select it in the left menu and click at the top of the Folding Keyframe detail menu. The new keyframe is added with all the same crease constraints, which is useful when multiple keyframes act on the same groups of creases.
Deleting Keyframes
To delete a keyframe, select it in the left menu and click at the top of the Folding Keyframe detail menu.
Renaming Keyframes
Each keyframe has a name field at the top of the Folding Keyframe detail menu. Rename keyframes to keep track of each folding stage (e.g., “Fold sides”, “Close top flaps”, “Tuck in tab”).
Replaying the Folding Animation
To replay the full folding animation across all keyframes, click next to the Folding Simulation section header in the left menu (or press R when no keyframe is selected). The simulation will play through each keyframe in sequence, animating from the flat dieline to the fully folded design.
To replay a single keyframe: select it and press R (or click in the Folding Keyframe detail menu).
Press the R hotkey to replay, 2 for dieline view, 3 for folded model
view.
Help and Support
If you ever need help using PackCAD Mockup, feel free to reach out at support@formfinding.studio. We welcome feedback, feature requests, and bug reports!